
This free printable split pin robot craft includes 8 different robot templates that kids can color, cut out, and assemble with movable parts.
Using split pins (also called paper fasteners or brads), kids can connect the robot pieces to make arms, legs, and other parts that move. Once assembled, they can pose their robots in different positions.
It’s a fun, hands-on craft for kids who love robots, especially ones they can move and pose!
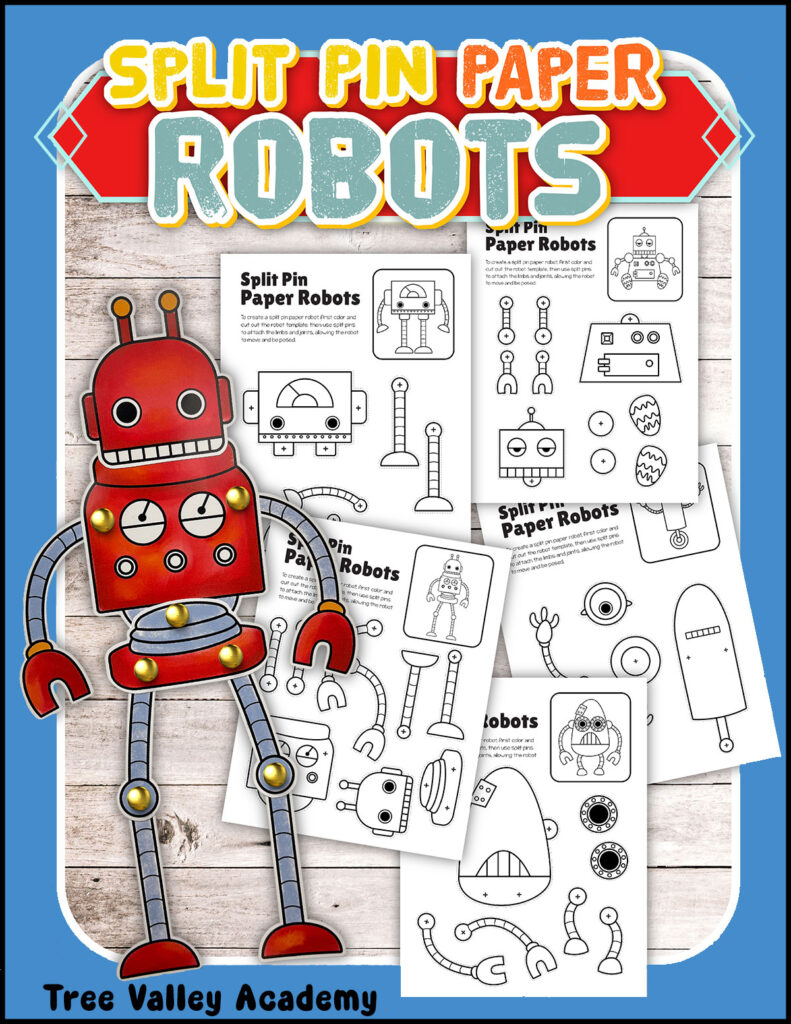
Printable Robot Templates
The PDF includes 8 different robot designs, with one robot per page. Each template has separate pieces to color and cut out, along with marks showing where to attach the split pins.
Once assembled, the robots have movable joints, so kids can pose their arms, legs, and other parts in different positions.
Difficulty Level
This craft is best for elementary-aged kids who are comfortable using scissors.
Younger children can help with the coloring, but they may need assistance cutting out the smaller pieces and attaching the split pins.
The activity also gives kids practice with fine motor skills, hand-eye coordination, and following step-by-step instructions.
How to Make a Split Pin Robot Craft
You’ll only need a few basic supplies to make these movable paper robots.
Supplies Needed
- Printed robot craft templates – printer paper or white cardstock
- Crayons, colored pencils, or markers
- Scissors
- Split pins (paper fasteners or brads)
- Something to make small holes, such as a hole punch or a pointed tool used by an adult
Instructions
- Choose a robot.
Print the robot template you’d like to make. There are 8 different designs to choose from. - Color the pieces.
Let kids decorate their robot however they like. They can use traditional robot colors or come up with their own colorful designs. - Cut out the robot.
Carefully cut around each piece of the template, keeping the separate parts intact. - Make the holes.
Use the small marks on the template to identify where the split pins need to go. An adult can help make the holes. - Assemble the robot.
Line up the pieces at their connecting points. Push a split pin through the holes and open the prongs at the back to hold the pieces together. - Make it move!
Once all the pieces are connected, gently move the robot’s arms, legs, and other movable parts into different positions.
Don’t fasten the split pins too tightly. Leaving a little room at the joints will make the robot easier to move.
Fun Ways to Use Your Paper Robots
Once the robots are assembled, kids can do more than just display them.
Here are a few ideas:
- Robot storytelling: Give each robot a name and invent a story about its adventures.
- Robot collection: Make several of the 8 designs and create a group of robot friends.
- Robot-themed learning: Add this craft to a homeschool unit about robots, inventions, or simple machines.
- Indoor activity: Keep the templates handy for a rainy afternoon or a screen-free craft session.
These movable robots also make a fun addition to a classroom craft activity or a robot-themed party.
Download and Print
Ready to make your own moving paper robots?
The free printable PDF includes 8 robot craft templates, with one robot per page.
To get your copy, fill out one of the forms on this page. The PDF will be emailed to you.
You can print all 8 designs or choose just the pages you want to use.
The templates are black and white, so kids can color their robots before assembling them. For sturdier robots, consider printing on cardstock instead of regular printer paper.
Once you’ve printed your favorite designs, gather your coloring supplies, scissors, and split pins, and you’re ready to start creating!
More Robot Activities
For more robot-themed fun:
- Make a 3D paper robot to color, cut out, and assemble.
- Practice multiplication with a robot missing factors worksheet.
- Discover how robots milk dairy cows on a modern farm.
Looking for more hands-on activities? Explore our growing collection of printable crafts for kids!