Is your little artist ready to learn how to draw a lion?
Here are 2 simple step-by-step tutorials showing kids how to draw their very own lions. Whether your child is just starting to draw or looking for a fun art activity, these simple line drawings make learning to draw lions both simple to follow and perfect for beginners.
To make it even easier, I’ve included a free printable PDF with all the steps, so kids can practice anytime – at home, in the classroom, or even on the go.
Supplies
Here’s a quick list of supplies kids will need to draw their lions:
- a pencil
- eraser
- paper – any drawing, printer paper, or sketchbook works great. (affiliate link)
- colored pencils, markers, or crayons (optional) – Once the lions are drawn, kids can have fun adding their favorite colors to make the drawings stand out.
Now let’s start drawing!
How to Draw a Simple Lion for Kids
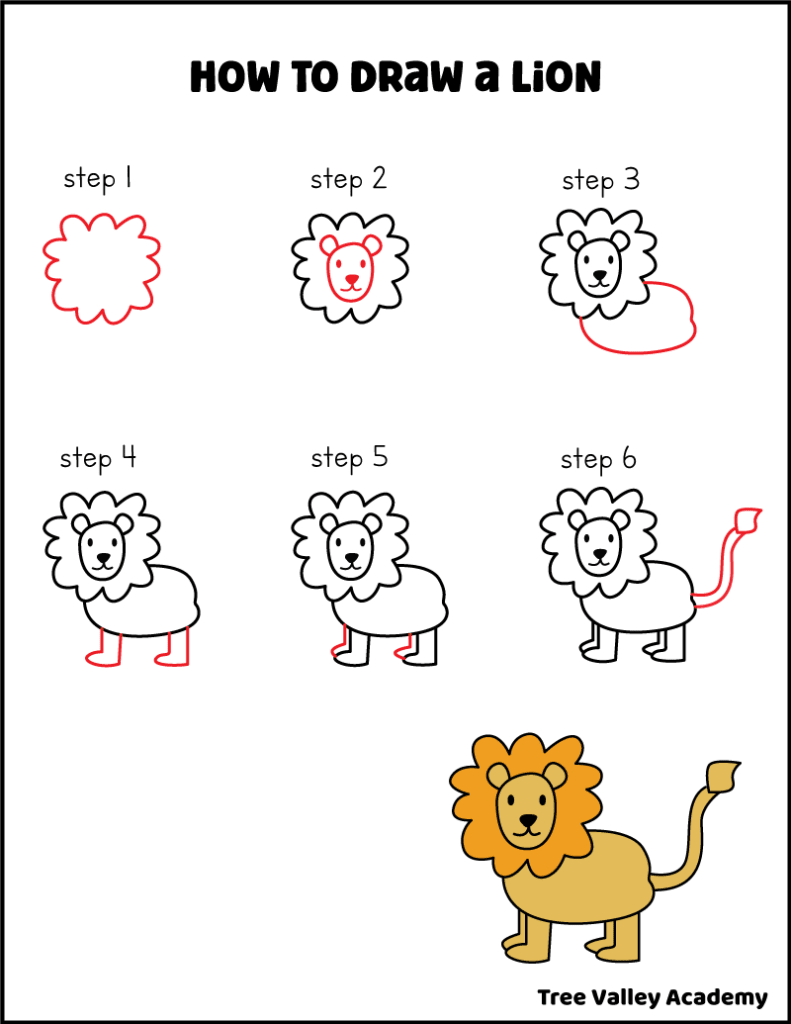
Our first lion has 6 easy steps:
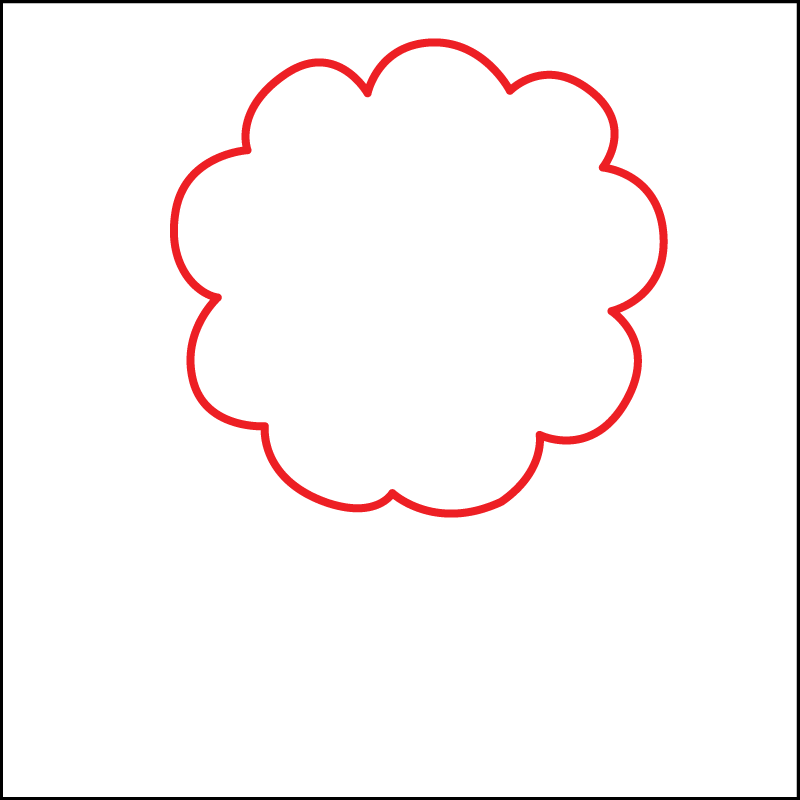
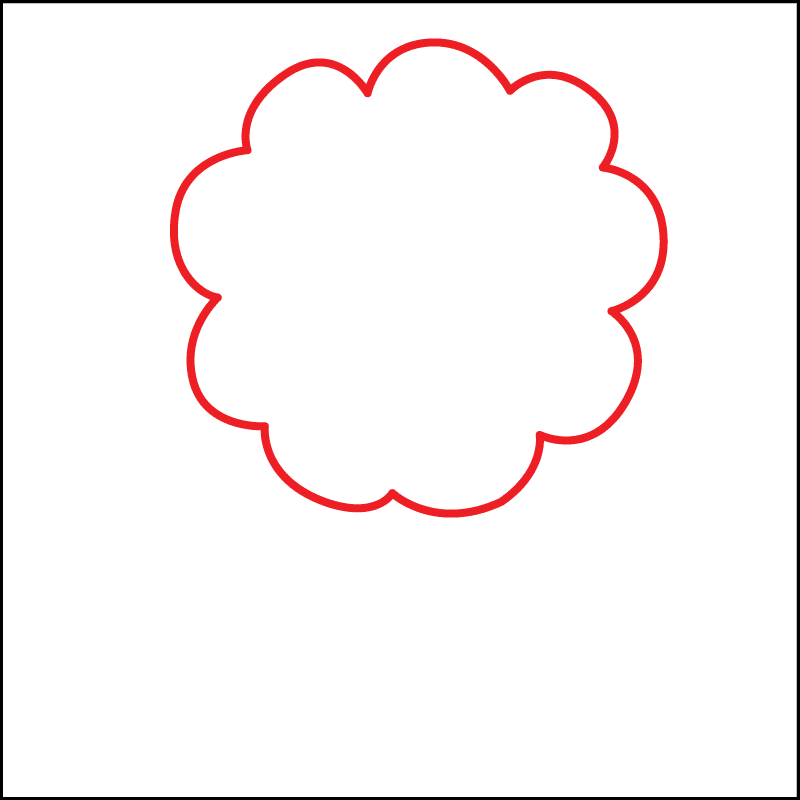
Step 1: Drawing the Lion’s Mane
Begin by drawing a rounded circle with wavy edges, like a puffy cloud.

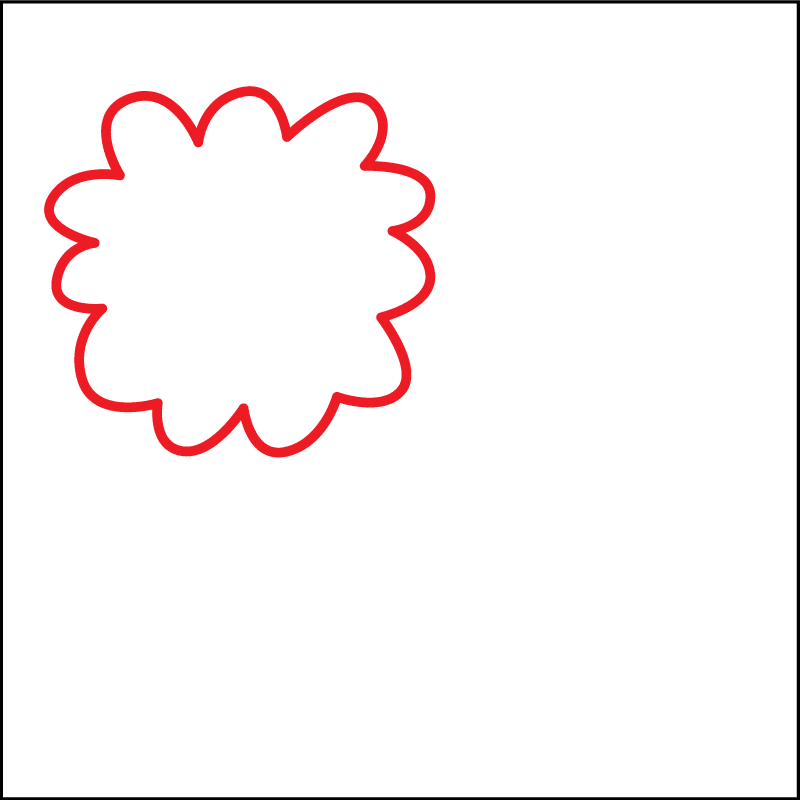
Don’t worry about making it perfect—wavy, bumpy lines add character and make the mane look even cuter!
Step 2: Drawing the Face, Ears, Eyes, Nose, and Mouth
Inside the mane, draw a smaller oval to outline the lion’s face.
Next, add two little curved lines near the top of the face for ears.
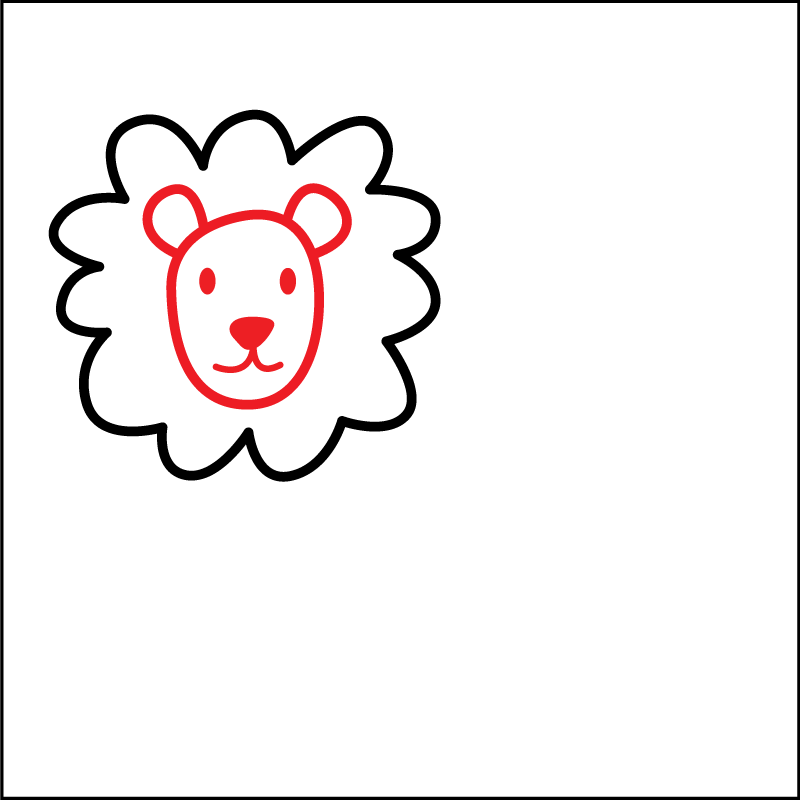

Now, let’s add the lion’s facial features:
- Eyes: Draw two small ovals near the center of the face for the eyes. Once drawn, color in the eyes to fill them in.
- Nose: Below the eyes, draw an upside-down triangle for the lion’s nose. Round off the edges a little to make it softer. Color in the nose to fill it in completely, giving it a nice bold look.
- Mouth: From the bottom of the nose, draw two small curved lines that curve outward and down, like a “W” shape. This will give your lion a sweet, smiling face.
Step 3: Drawing the Body
Next, let’s draw the lion’s body. Start by drawing an oval-like shape just below the lion’s head.
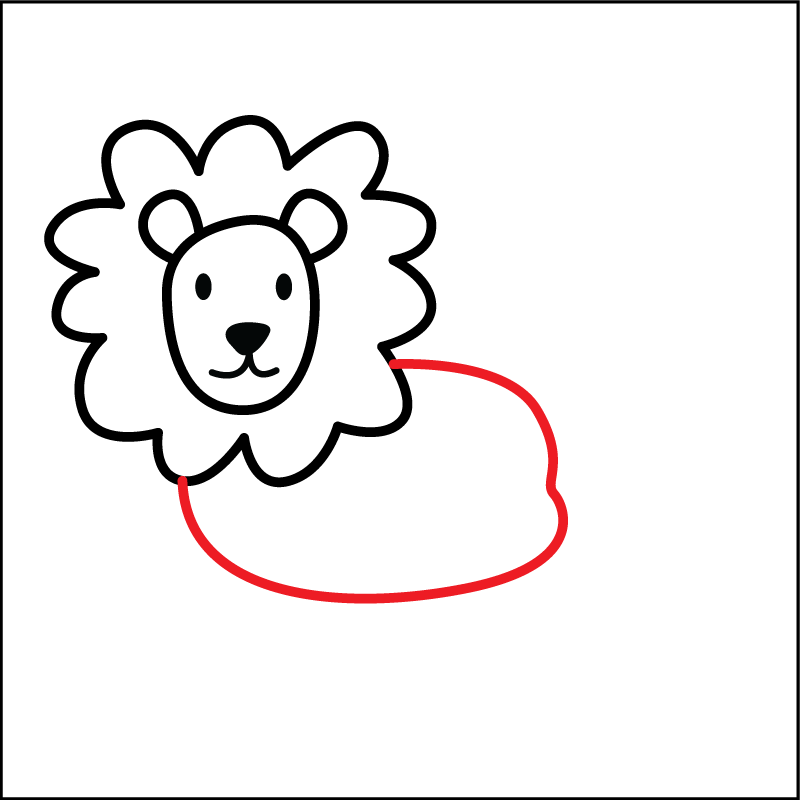

Keep in mind that you won’t see the entire oval because the mane will cover part of it. This shape forms the lion’s chest and torso,
Step 4: Drawing the Lion’s Left 2 Legs
Now, let’s add the lion’s left two legs.
For each leg: draw two vertical lines extending down from the bottom of the body. The line on the left should be slightly shorter than the one on the right, giving the legs a natural, balanced look.


Next, connect the two lines at the bottom with a curved shape, almost like a pointed letter “C.” This will form the lion’s paws.
Step 5: Drawing the Lion’s Right 2 Legs
A little to the left of each leg, draw a line and curved shape, very similar to the left legs but slightly shorter. These will form the lion’s right legs.

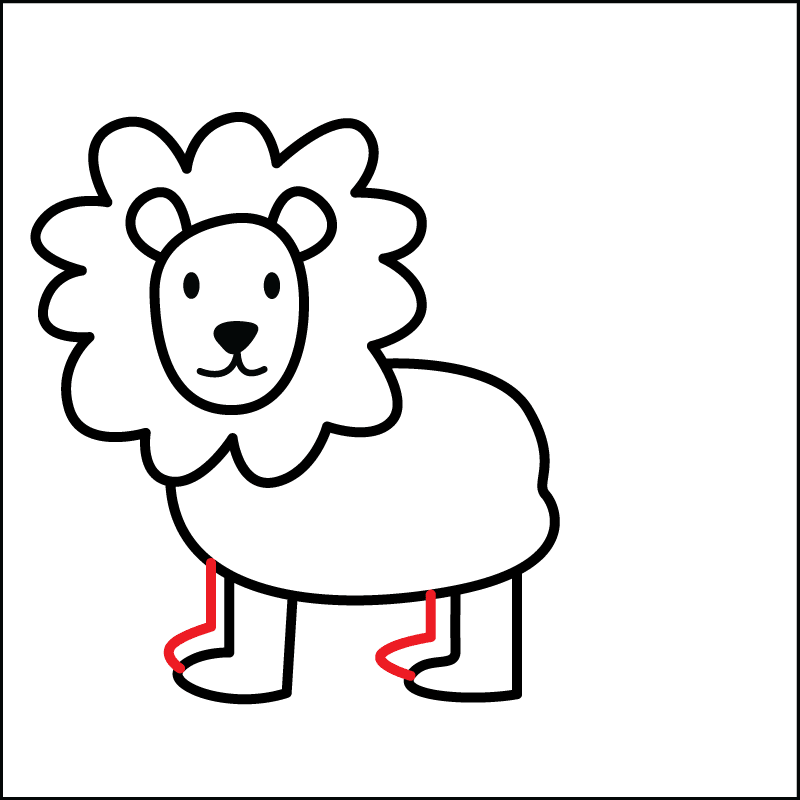
Since we are drawing the lion from its left side, the right legs will appear slightly smaller and positioned behind the left ones.
Step 6: Drawing the Tail
To finish your lion, draw its tail!
On the right side of the body, draw 2 long, curvy lines that extend outward and curl up slightly.
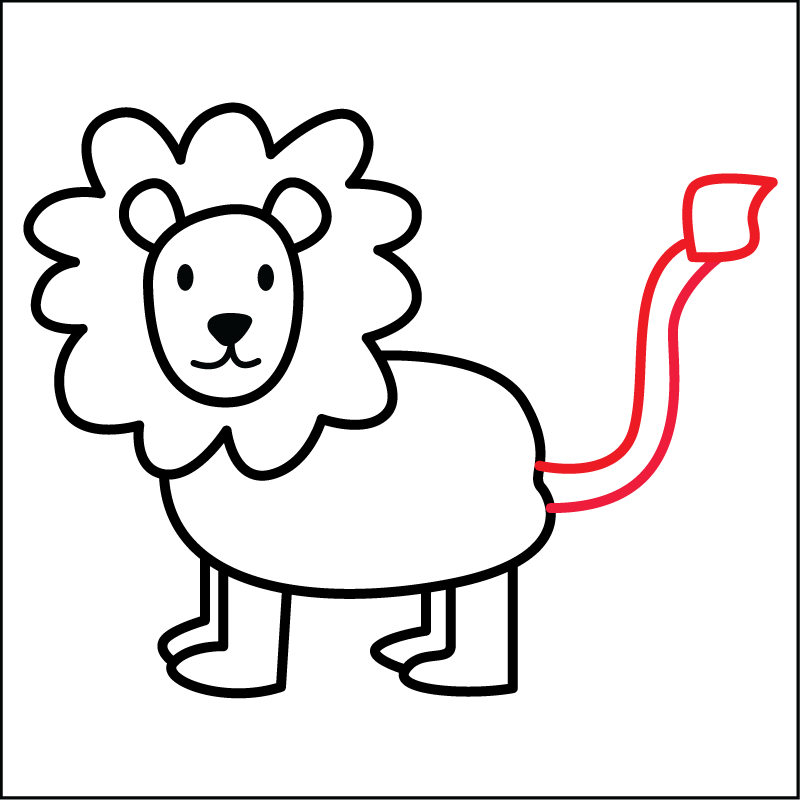

At the end of the tail, draw a small tuft of hair by adding a curvy shape that looks like a pointy bundle of fur. This adds a fun and playful touch to your lion’s look!
Free Printable PDF: All 6 Steps to Draw this Easy Lion
You can download a free printout that includes all 6 steps further below.

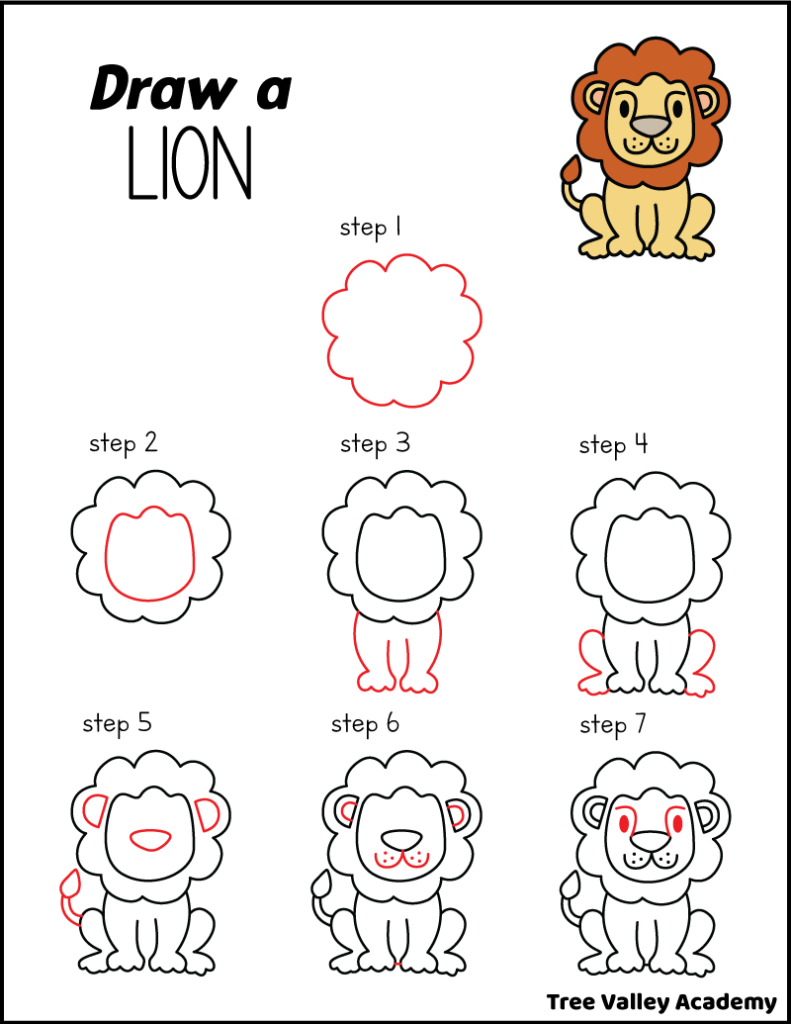
Lion #2: How to Draw a Sitting Lion
Here’s another fun cartoon lion for kids to draw. The lion is sitting looking very relaxed and happy. This easy-to-draw lion can be drawn in 7 simple steps:
Step 1: Drawing The Lion’s Mane
Start by drawing a large, fluffy circle to create the lion’s mane. Think of it like a cloud surrounding the lion’s head.
Step 2: Drawing the Lion’s Face
Inside the mane, draw the lion’s face by sketching a wide, rounded “U” shape. At the top of the “U,” add three small bumps in the center, like gentle hills, to form the top of the head.
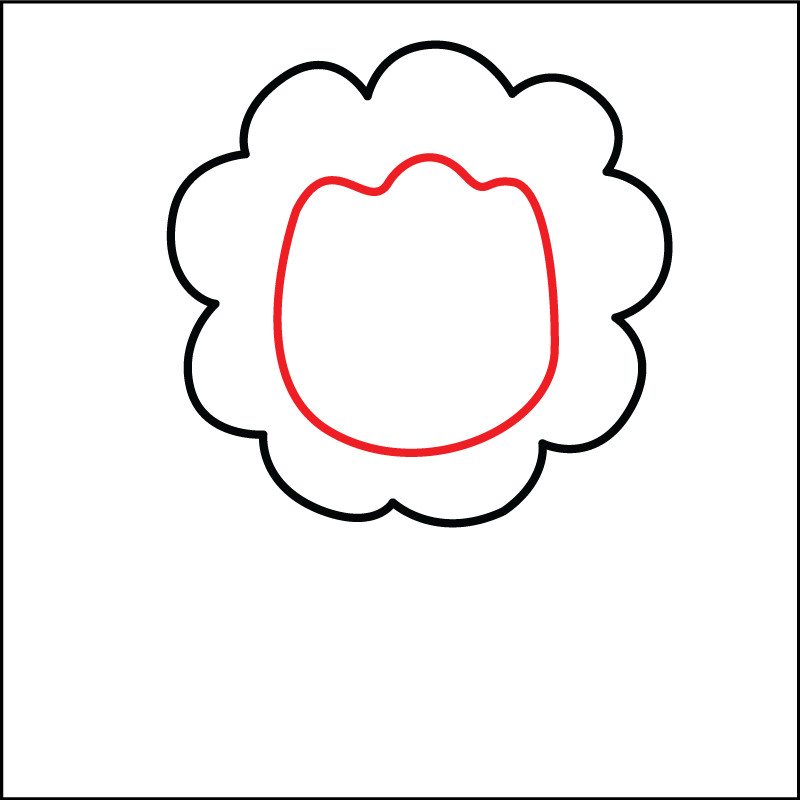

This creates a soft, natural shape for the lion’s face.
Step 3: Drawing the Lion’s Front Legs
Let’s add the lion’s front legs.
Start below the mane, on each side of the face. Draw two long, slightly curved lines going downward to form the legs.
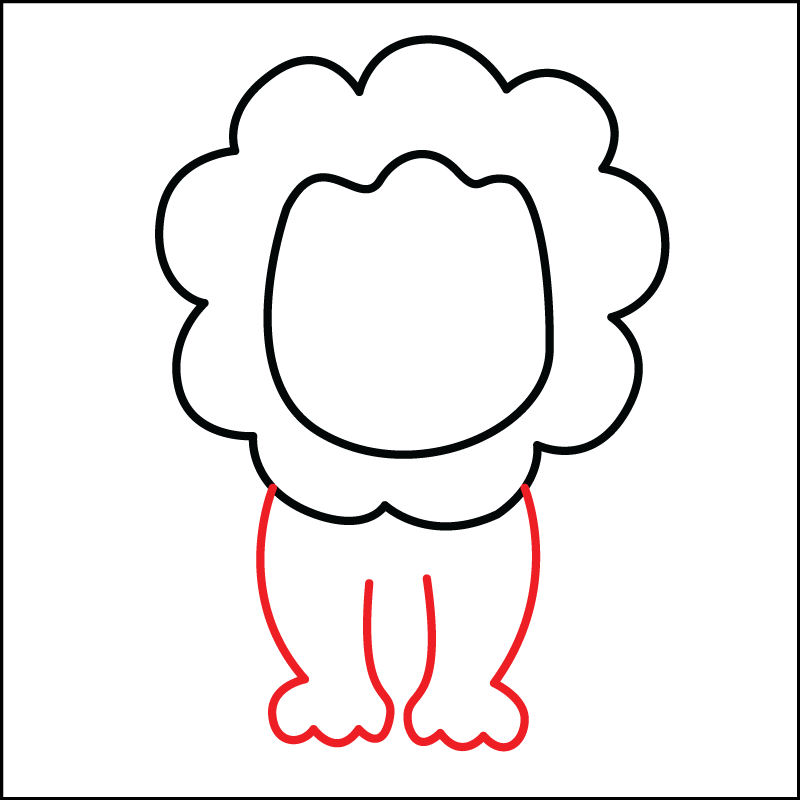

At the bottom of each leg, draw a rounded paw shape with three small bumps for the toes.
Step 4: Drawing the Lion’s Back Legs
To add the lion’s back legs, start on each side of the front legs. Draw a large, curved line that bends outward and then loops inward, forming the back paws.
The curved lines should give the legs a rounded and relaxed appearance.
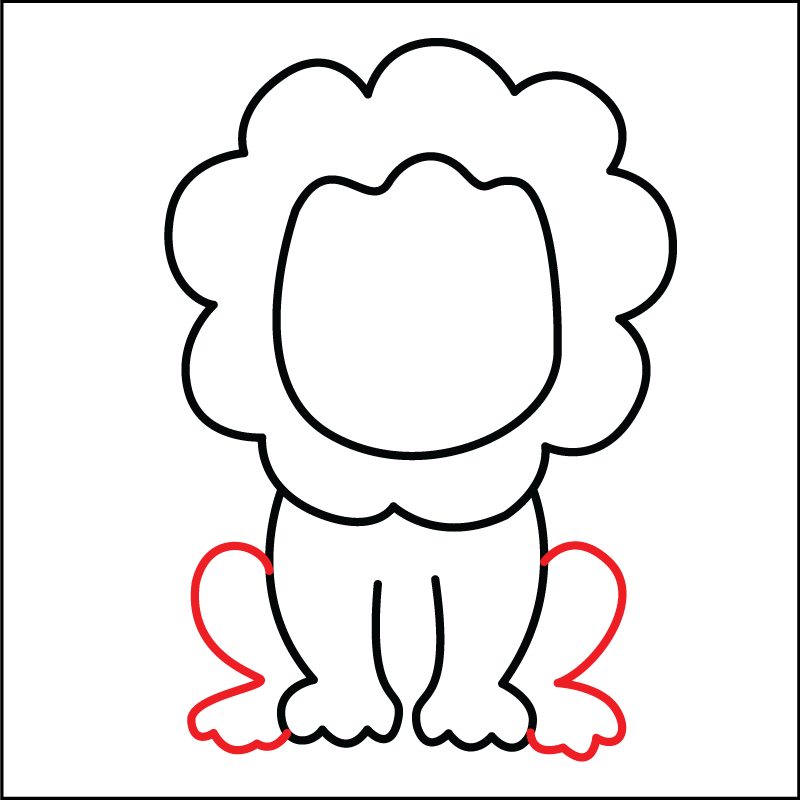
Make three small bumps at the bottom of each paw to show the lion’s toes.
Step 5: Drawing the Lion’s Nose, Ears, and Tail
In the center of the lion’s face, draw a rounded triangle shape with soft edges. This forms the lion’s nose.
Tail: On the left side of the lion’s body, draw a curved line starting near the back leg and looping upward. At the tip of the tail, add a teardrop-shaped tuft to complete the tail.
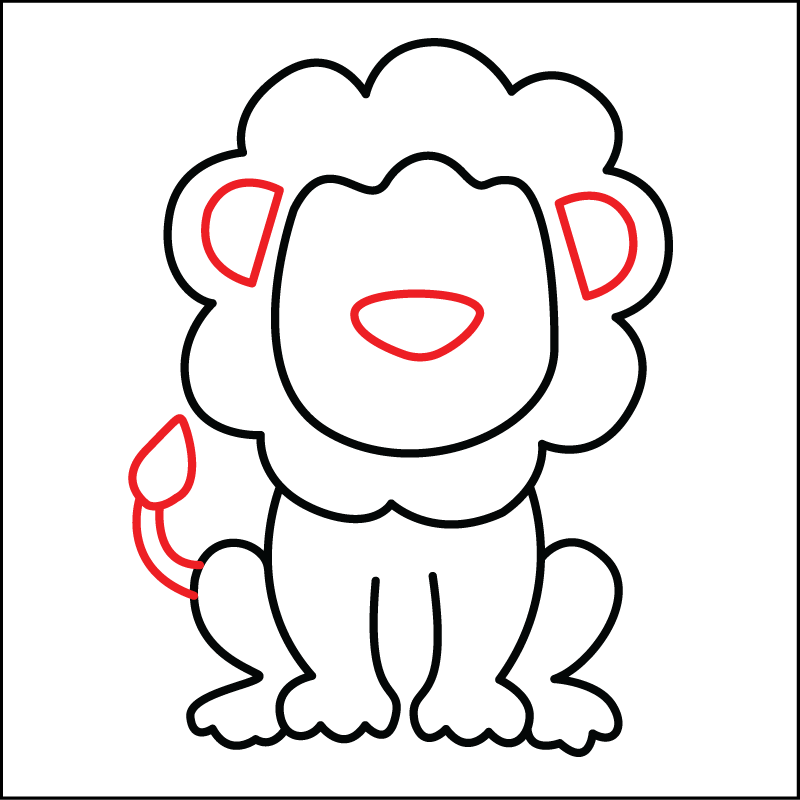

To begin drawing its ears, draw two semi-circular shapes on each side of the lion’s head, slightly angled to match the curve of the mane. We will finish the ears in the next step.
Step 6: Drawing the Mouth, Whiskers, and Finishing Details
Inside each ear, draw a curved line that follows the contour of the outer ear to add depth.
Place your pencil just below the nose. Draw two curved lines that extend downward and outward, creating a soft “W” shape for the lion’s mouth.
Add three small dots on each side of the mouth to represent the whisker spots.


To finish drawing the chest, add a small, curved line at the bottom center of the lion’s body, between the front legs.
Step 7: Drawing the Eyes and Finishing the Nose
Next, we will draw the lion’s eyes. Draw two oval shapes on the lion’s face and position them symmetrically on either side of the nose. Make sure the ovals are vertical and evenly spaced.

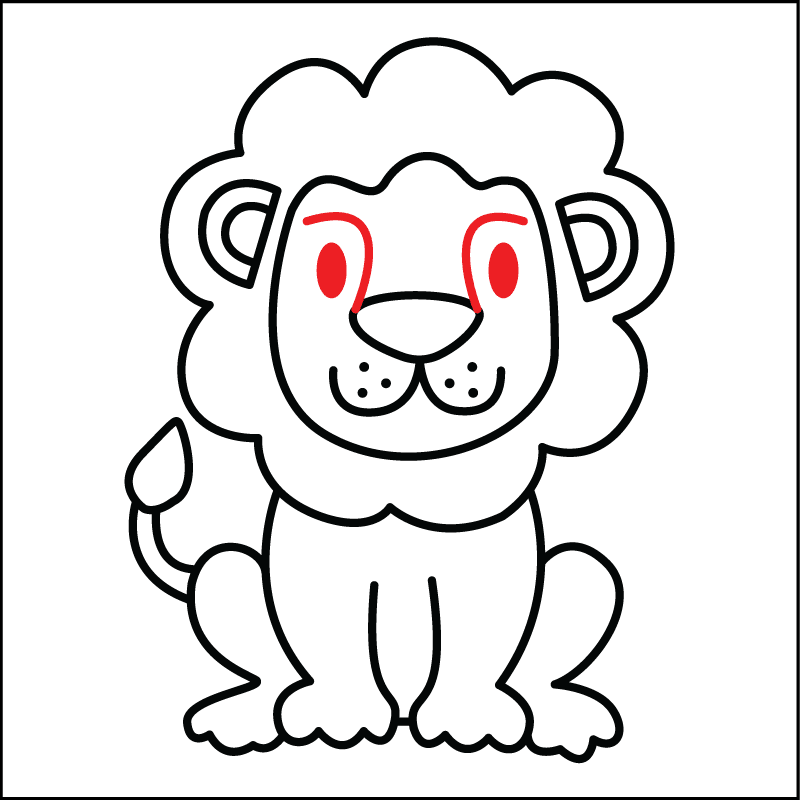
Starting just above the eyes, draw two smooth, curved lines that connect downwards towards the top edge of the nose. These lines act as a continuation of the nose, giving the lion’s face more definition and a cartoon-friendly style.
Free Printable PDF: All 7 Steps to Draw this Cartoon Sitting Lion
A page showing how to draw all 7 steps can be downloaded below.

Download How to Draw a Lion for Kids PDF
To make it even easier for kids to follow along, I’ve created a free 2-page printable PDF with all the steps to draw both lions. This handy guide includes clear visuals for each step so kids can draw at their own pace, whether at home, in the classroom, or on the go!
You can download the PDF using one of the two forms below.
Just enter your email, and the printable will be sent straight to your inbox. Plus, you’ll also receive other fun and free activities for kids that I share regularly!
Once downloaded, you can print it out, grab some pencils, and start drawing your lions step-by-step. Happy drawing!
Additional Drawing Tips for Kids
To help kids get the most out of these lion drawing tutorials, here are a few simple tips to make the process even more fun and frustration-free:
- Start with Light Pencil Strokes: Encourage kids to sketch lightly at first so they can easily erase and adjust as they go. Once the lion looks just right, they can trace over their lines with a darker pencil or marker.
- Break it Down: Remind kids to focus on one step at a time.
- Get Creative with Colors: Once their lion is complete, let kids unleash their creativity by adding color. Lions can be their usual golden brown, or kids can use bright, bold colors for a more imaginative twist.
- Practice Makes Perfect: Drawing is a skill, and the more kids practice, the more confident they’ll feel. Suggest they try drawing both lions a few times to see how their skills improve!
- Personalize the Lions: Encourage kids to give their lions some personality! They can add funny facial expressions, a super fluffy mane, or even a background like a jungle, savanna, or sunset.
The most important thing? Have fun with it! Drawing isn’t about perfection—it’s about enjoying the process and letting creativity shine.
Kids might also enjoy our fun and free printable safari word scramble.