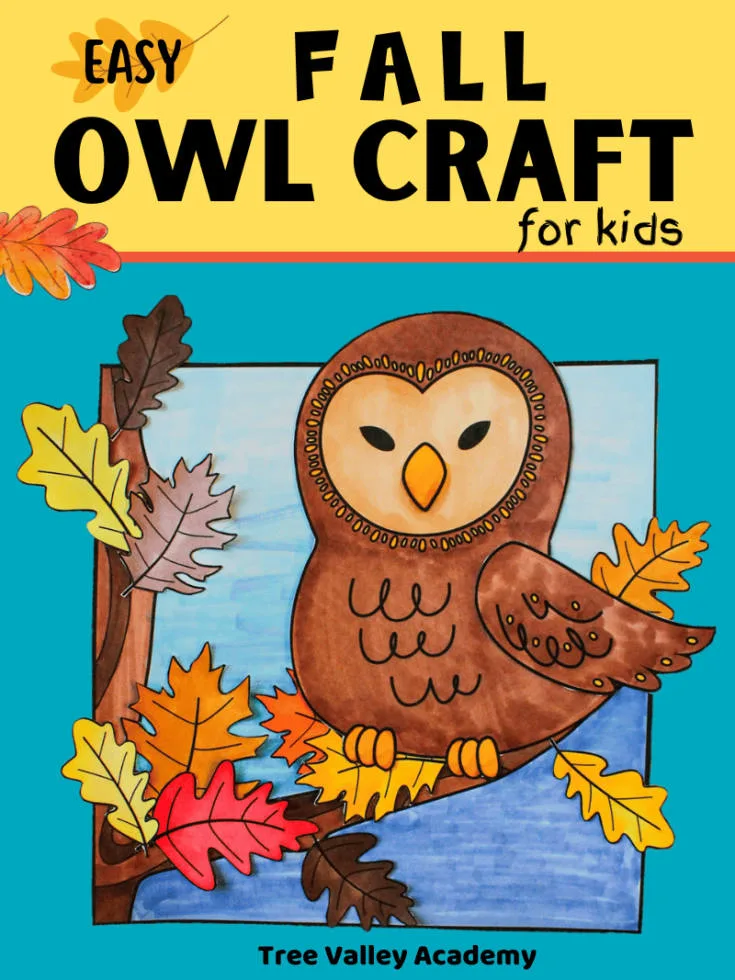
Here’s a cute fall owl craft for kids to make.
The owl cut and paste craft is a fun autumn activity for kids of all ages. All you need is the free printable below and art supplies you probably already have on hand.
The end result will be an adorable arts and crafts project of a barn owl perched on the branch of an oak tree.


How to Make This Fall Owl Craft
Grab your arts and crafts supplies and follow the steps below to make this easy fall owl craft.
Supplies Needed to Make Fall Owl Craft
- coloring supplies: your choice of markers, crayons, or pencil crayons
- glue stick
- pair of scissors
- owl craft coloring pages printed on 3 pages of white letter size paper – see file below to download PDF.

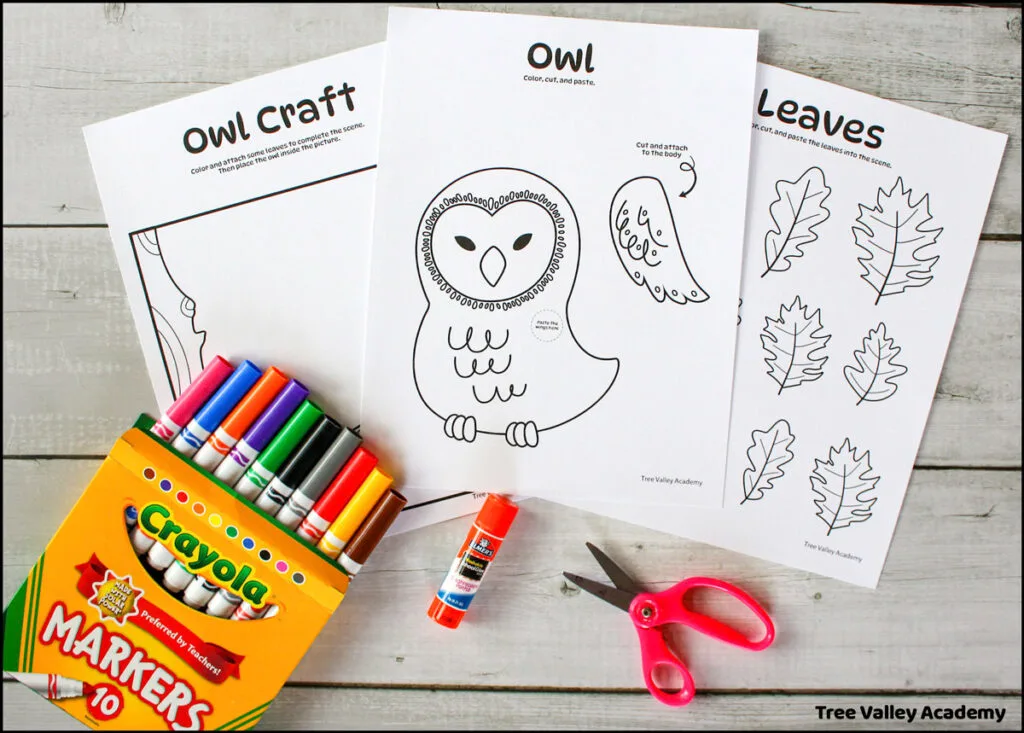
Printable Owl Craft
You can print out the paper owl craft using any of the forms below.
The PDF has 3 pages and is free to download and print.
Directions for Owl Cut and Paste Craft
The adorable paper owl craft can be made in 6 easy steps.
Step 1 – Coloring
The first step is to color.
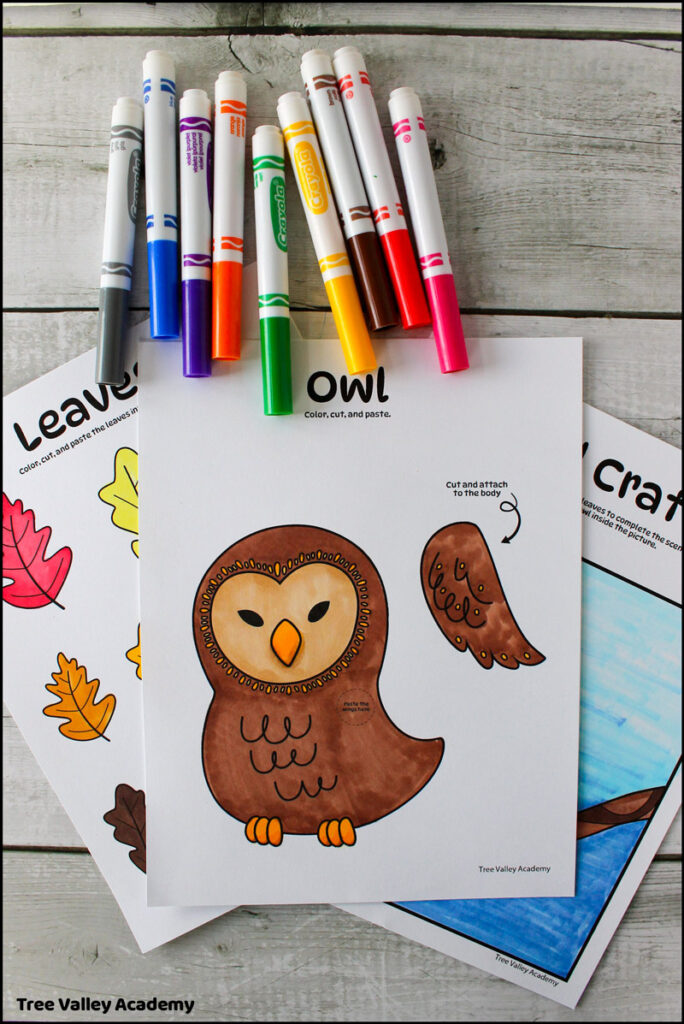

The owl, its wing, part of a tree, a background, and 11 oak leaves need to be colored
You can choose whether you want to color with crayons, pencil crayons, or markers.
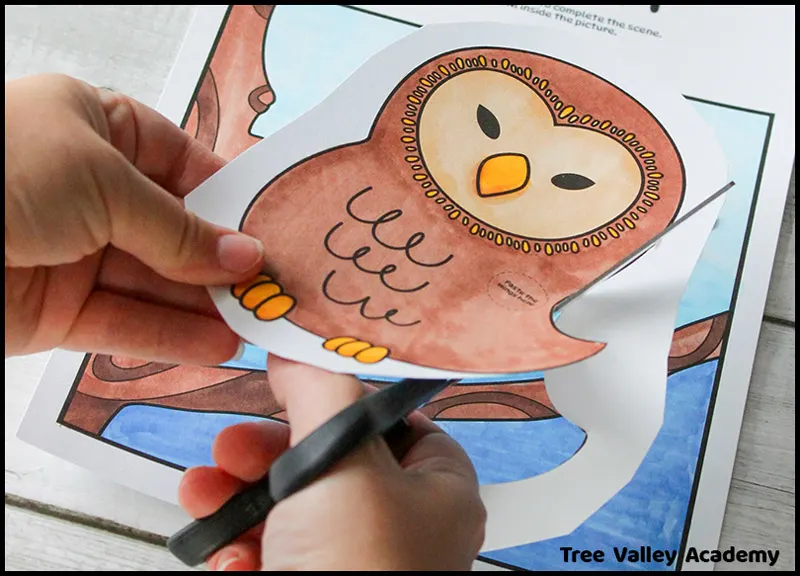
Step 2 – Cutting
After everything is colored, use scissors to cut out the owl, its wing, and the leaves.

Step 3 – Wing
Glue the wing to the owl’s body using a glue stick.
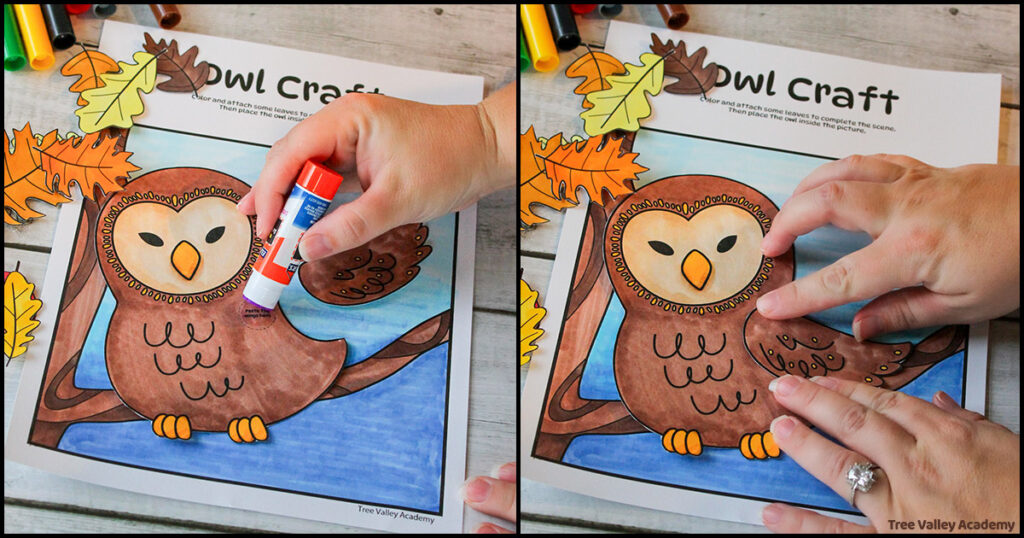
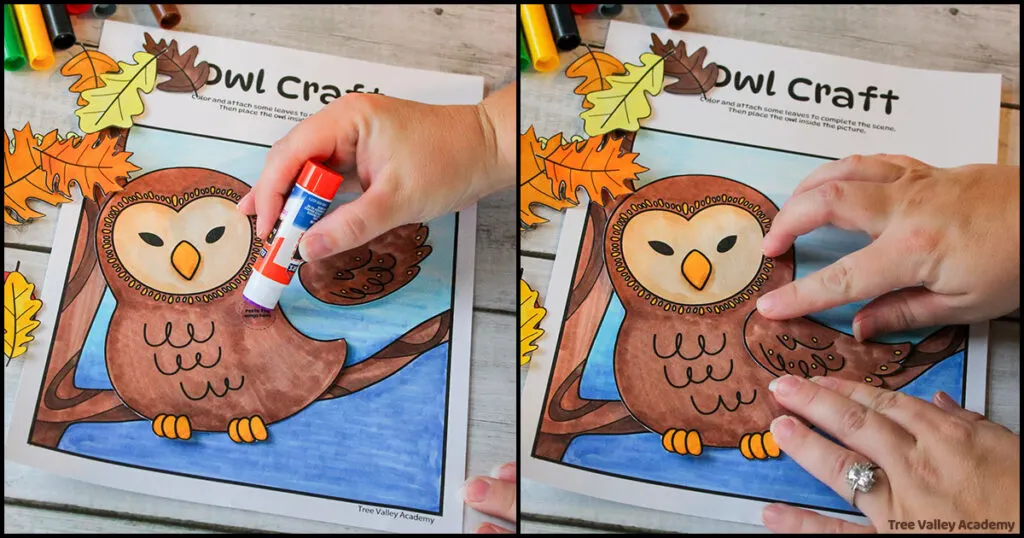
There is a spot on the owl’s body that shows where to add glue. After applying glue, place the wing on the owl’s body and press down firmly to stick.
Step 4 – Optional
This next step is not completely necessary but a good idea.
Figure out where on the branch you wish to place the owl. Then look to see what part of the branch and page the owl’s body covers.
It’s helpful to have this in mind when you’re doing the next step.
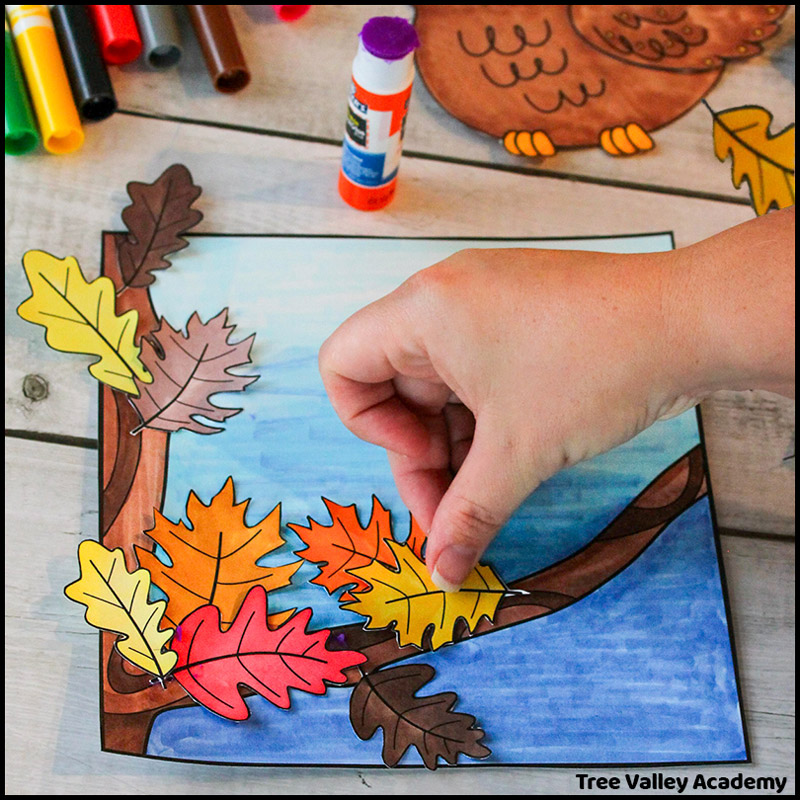
Step 5 – Oak Leaves
Decorate the oak tree, including its branch, with the 11 oak leaves you have colored and cut out.
Then glue them into place.

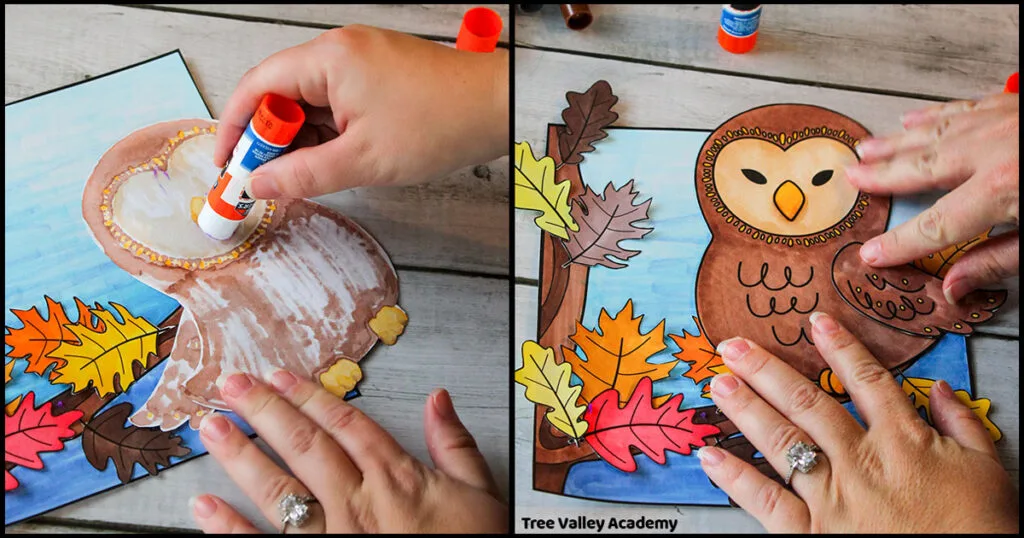
Step 6 – Owl
The last step is to glue the owl to the picture. You want the owl’s feet to be on the branch.

And there you have it! An adorable fall owl craft.
Unique Handmade Card Idea
Here’s an idea to repurpose your child’s finished owl craft. The paper craft can be used to easily make a unique one-of-a-kind handmade card that your child can give to a person they choose.
Simply glue the back of the paper craft and paste it onto a folded cardstock, in a color of their choice.
They can choose to have the folded card be more of a square shape or have a taller card where they can write text of their choice at the top.
Then they can write inside their card and give it to the person of their choice.
As an option, they can cut a folded white paper to size (a little smaller than the card itself). Afterward, they can write a message on the inside of the paper and then paste it inside the card.
It will be an adorable, unique, handmade card that the recipient is sure to love!
Fall Paper Owl Craft
Fall Paper Owl Craft

Kids of all ages will love this adorable paper owl craft. It's a fun and easy activity and craft for kids to make in the autumn season.
Materials
- coloring supplies: crayons, pencil crayons, or markers
- glue stick
- free printable printout on 3 pages of 8 1/2" X 11" white printer paper
Tools
- scissors
- printer
Instructions
- Color the owl, its wing, the background with a tree, and the 11 oak leaves.
- Use scissors to cut out all the elements: the background, owl, wing, and 11 leaves.
- Use the gluestick, and add glue to the spot indicated on the owl. Lay the owl's wing into place and press down firmly to attach.
- Place the owl in the spot you wish it to be, but do not glue. Observe which area of the background the owl covers. This will be handy to keep in mind. Put the owl aside for now.
- Glue the oak leaves on the tree and its branch. Keep in mind which area the owl will later cover. You might choose to have some leaves sticking out from the owl, but you wouldn't want to glue leaves in places that the owl would later completely cover.
- Glue the owl into place. Its feet should look like it's perched on the branch.
More Fun Owl Activities for Kids
- snowy owl coloring page connect the dots
How did your fall owl craft turn out? Did you use crayons, pencil crayons or markers? Let me know in the comments.
Linda
Wednesday 8th of October 2025
Adorable! Thanks!
Kaycee
Monday 29th of September 2025
It's really cute but the download link is not on the page.
Melanie Thomas
Monday 29th of September 2025
Hi Kaycee, if you're not seeing it, maybe try refreshing the page or trying from a different browser. It's not too far from the top. If you still can't see it let me know.
Linda
Wednesday 20th of August 2025
free fall owl printables, please. thank you.
Melanie Thomas
Wednesday 20th of August 2025
Hi Linda, you can get the printables by using one of the forms. The forms are not too far from the top.
Here's a link to a 1 minute YouTube video I made to show how to download printables on the website: https://www.youtube.com/watch?v=ZG8k37cCOJk