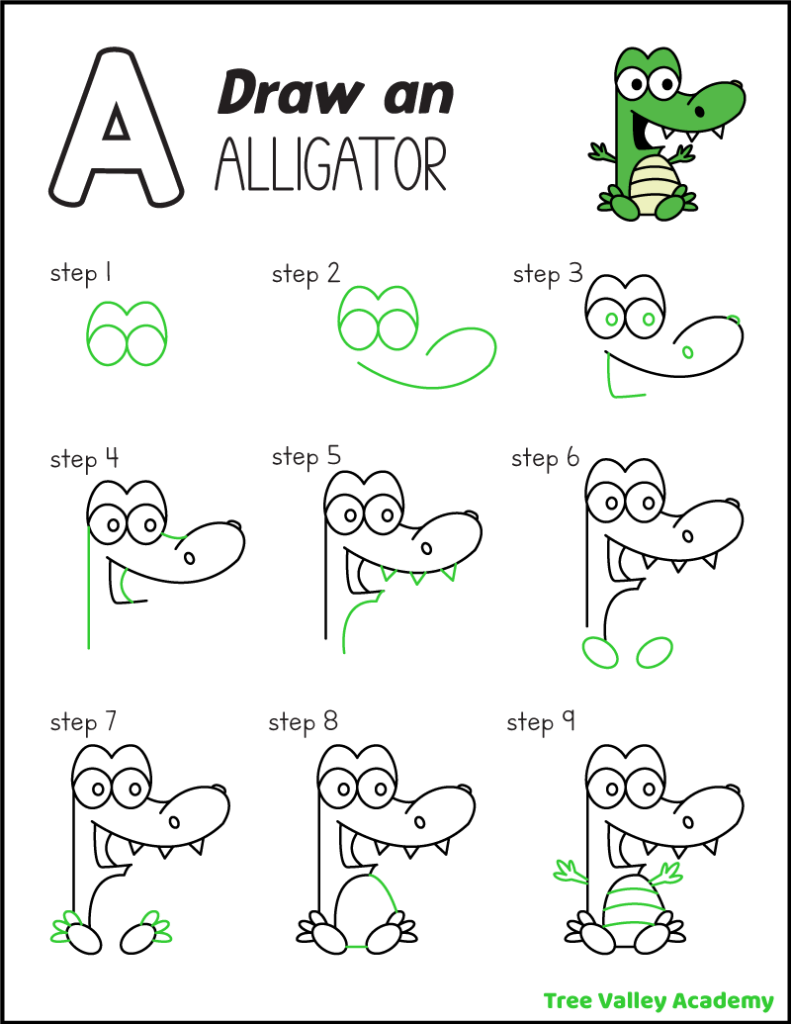
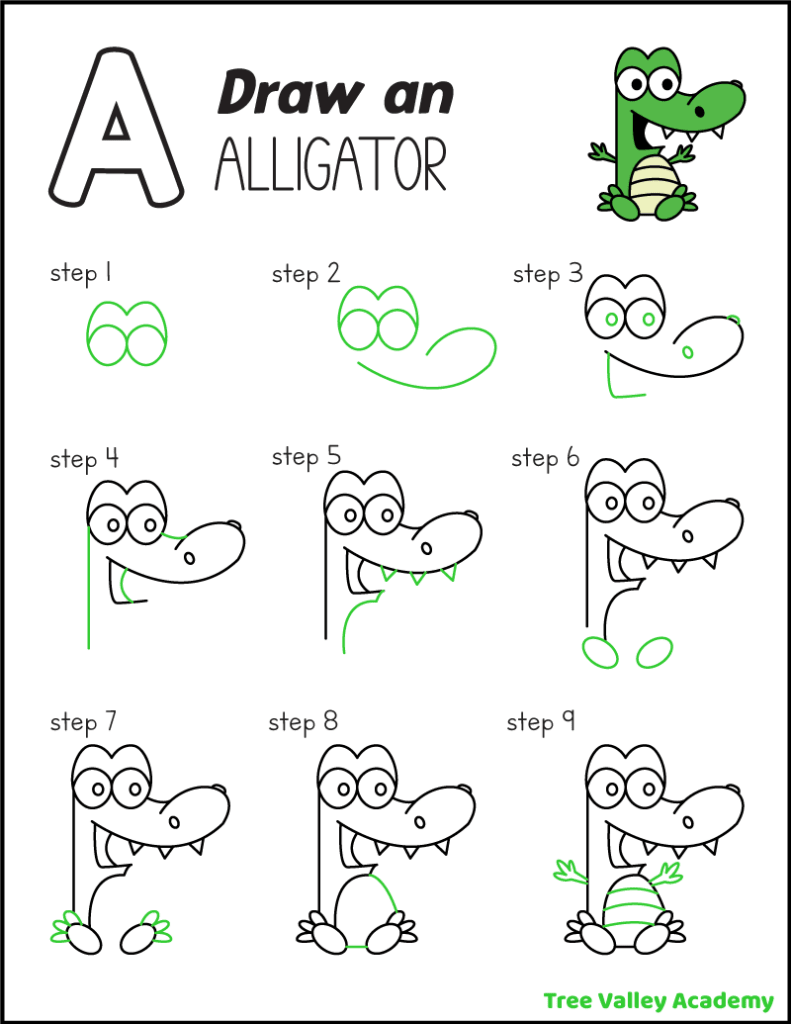
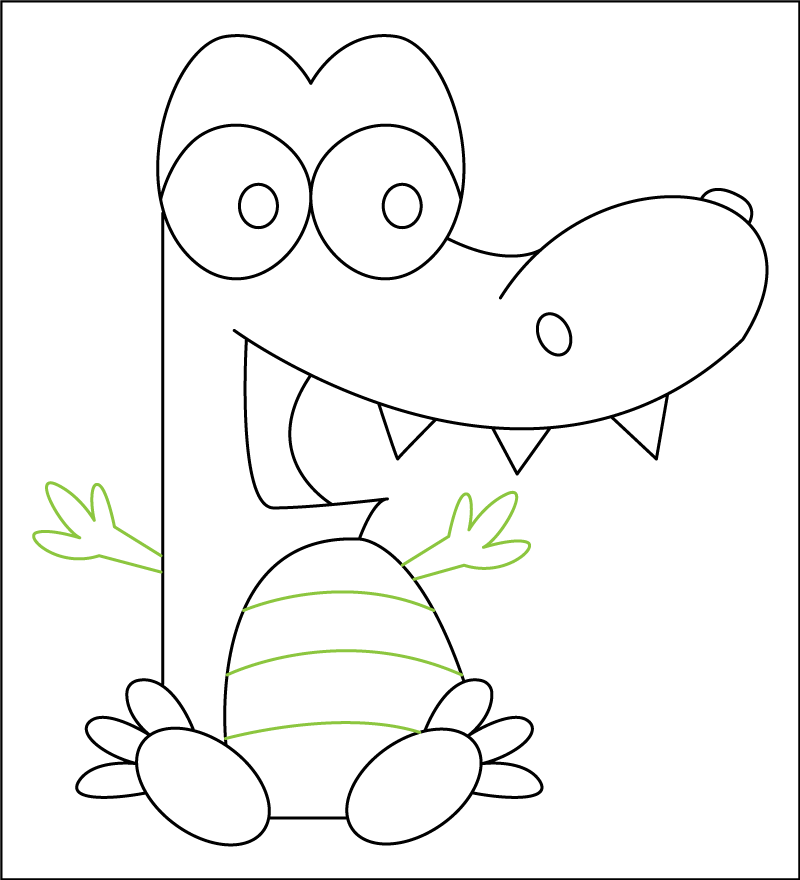
Kids can have fun learning how to draw an alligator. Here’s an easy step by step tutorial showing how to draw a cute cartoon alligator in 9 easy steps.
It will make a perfect letter A activity for kids. A is for alligator.
All kids will need is a pencil and paper. And perhaps some crayons or pencil crayons if they wish to color their finished drawing.
A free printable PDF showing all 9 steps is available for download and print.
Let’s get started. We’re going to draw a simple alligator, easy enough for kindergarten children to try. The cartoon alligator will be in a sitting position.
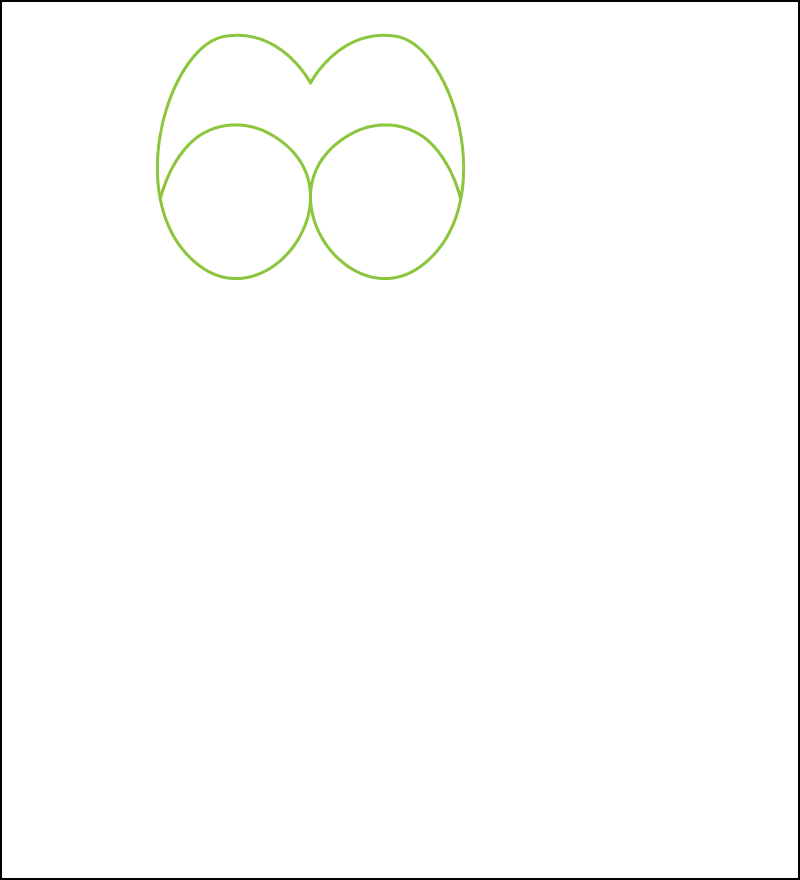
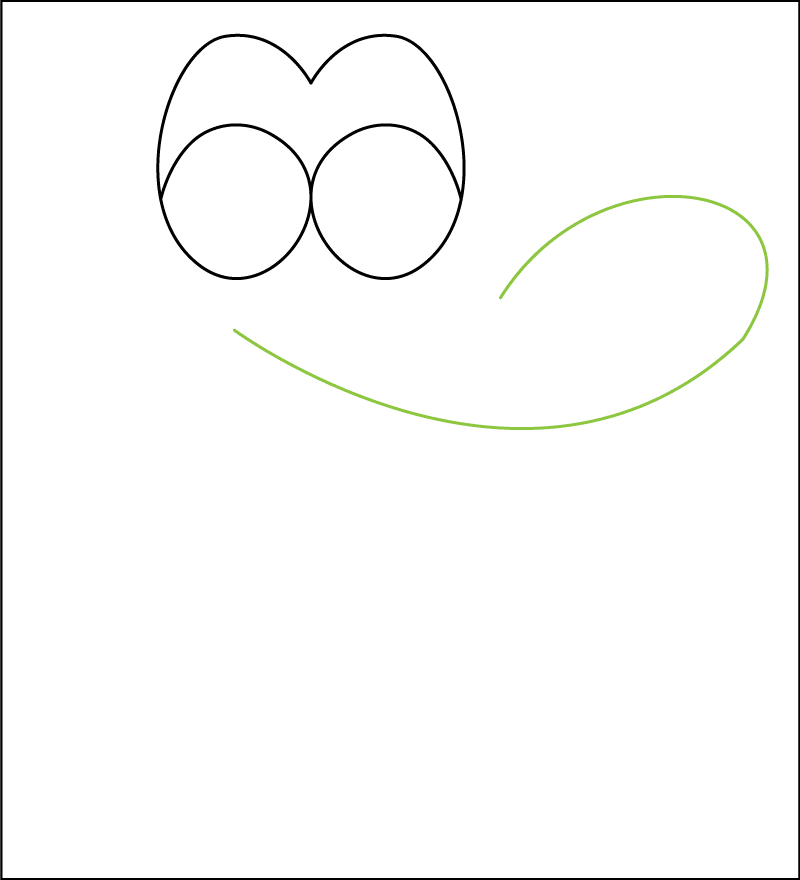
Step 1: Draw the Alligator’s Eyes
Begin by drawing the alligator’s eyes.
To do this draw the number 6 like you see in the picture. Make sure the far right edge of the 6’s loop is directly underneath the point where you began drawing the number 6.
Return your pencil to the same spot you began drawing the number 6, and draw the mirrored version of the same 6.

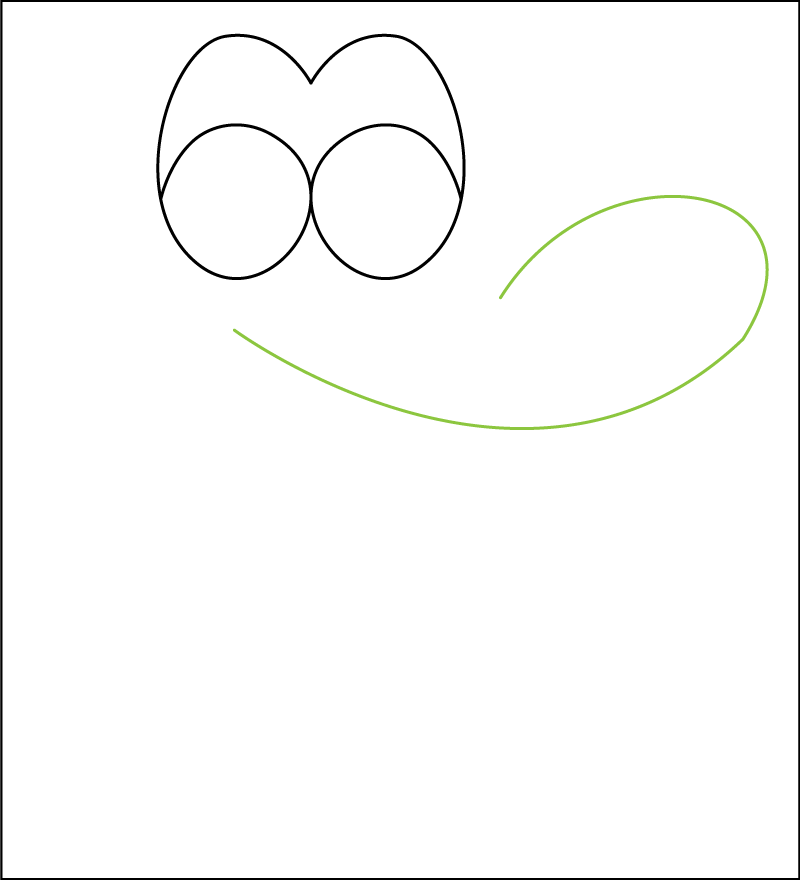
Step 2: Draw the Alligator’s Snout
Draw a curved line as shown for the alligator’s snout.
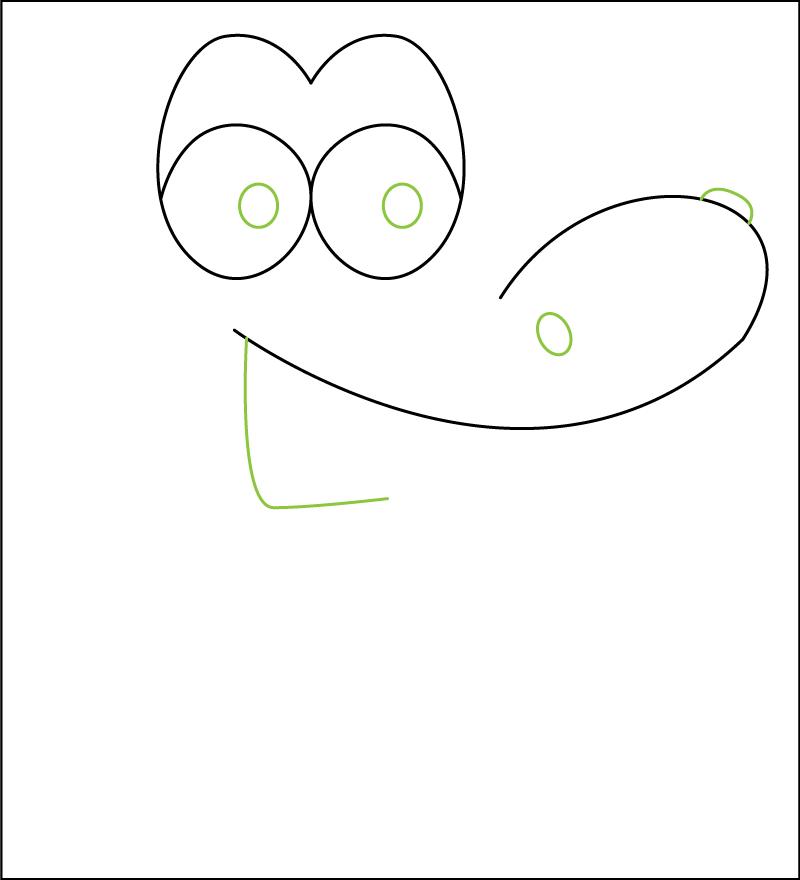
Step 3: Draw the Alligator’s Nostrils, Pupils, & Mouth
To draw the pupils, draw a circle inside each eye.
Next will be its nostrils. Draw a slightly angled oval inside the alligator’s snout and half of an oval on the outside line of the alligator’s nose.
Afterward, we will begin to draw its mouth. Add a bent line similar to an L, starting from the curved line of the alligator’s snout. The initial line going down can have a slight curve to it.

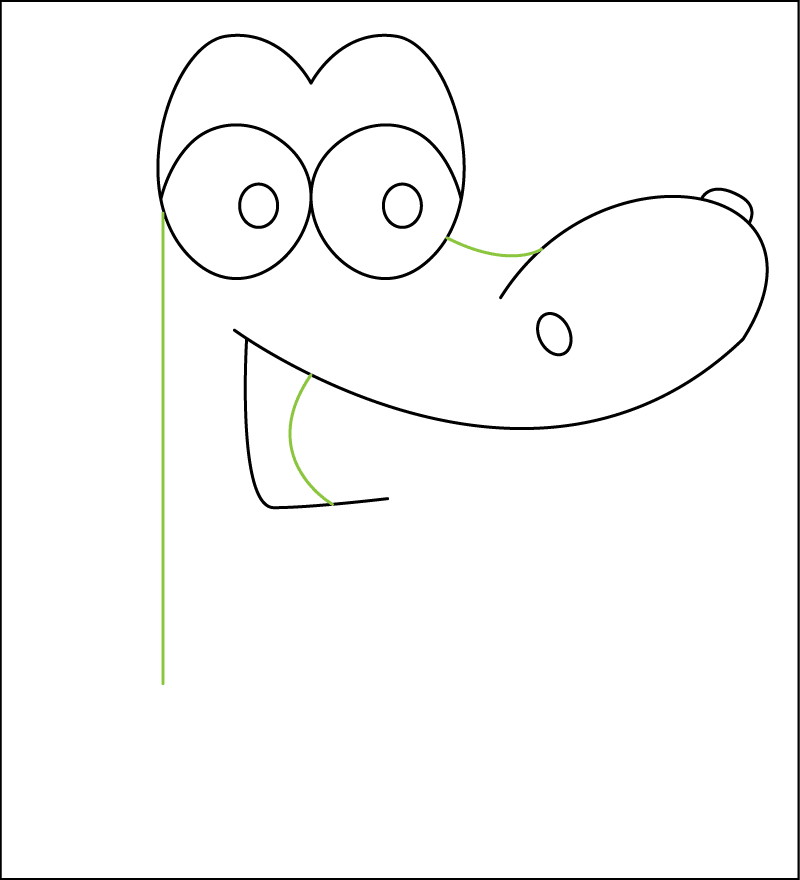
Step 4: Draw the Back and Finish Drawing the Snout & Mouth
A straight line is all that’s needed for the sitting alligator’s back.
Then, draw curved lines as shown to finish drawing the alligator’s snout & mouth.

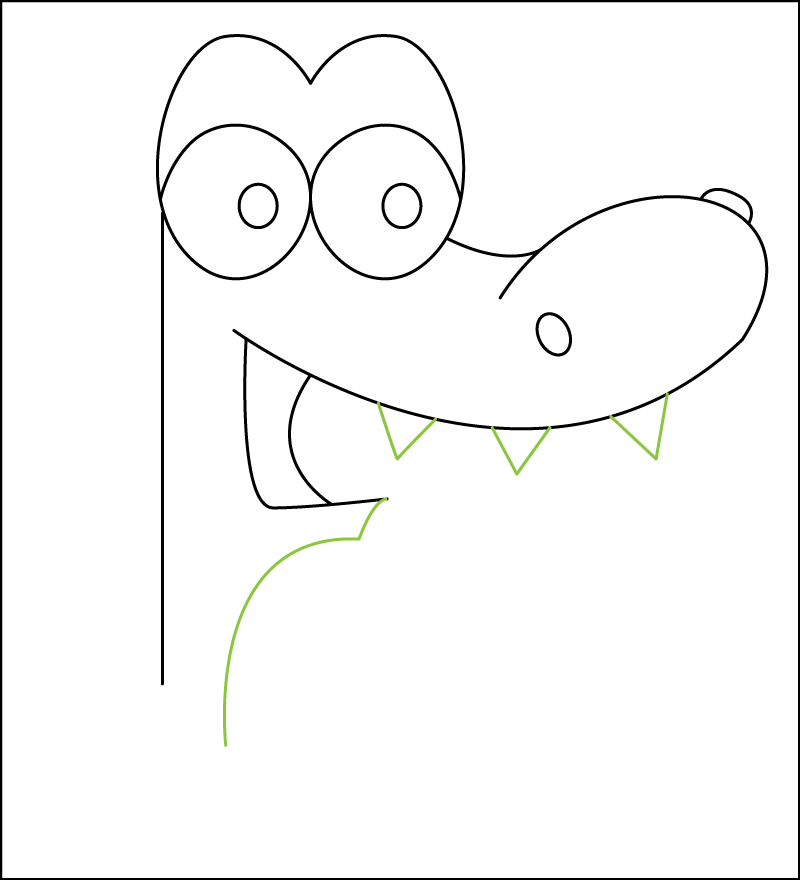
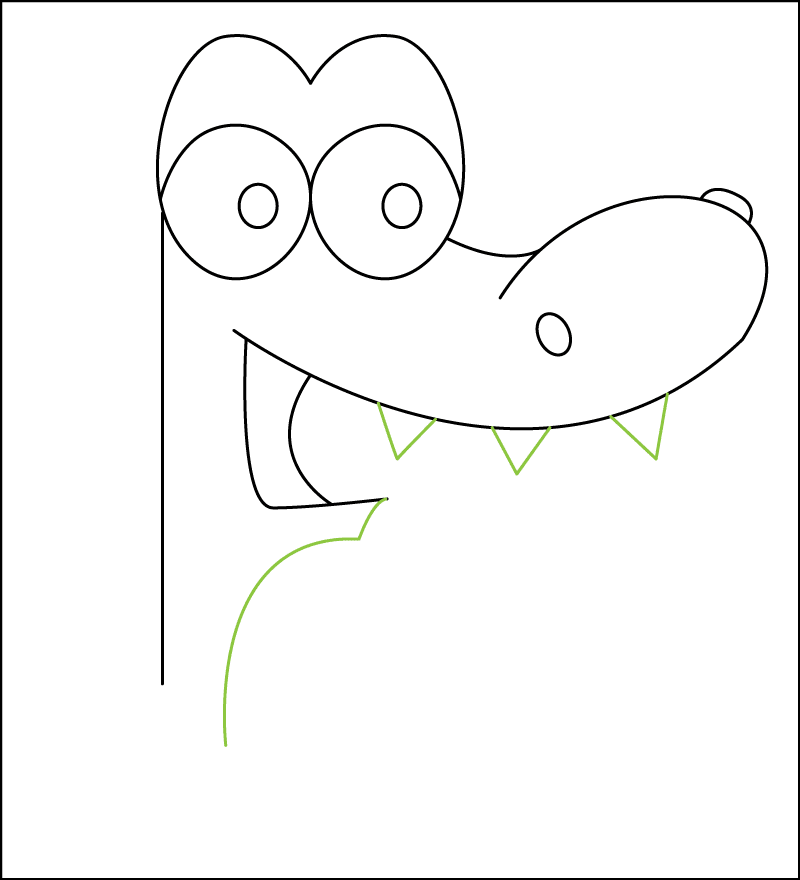
Step 5: Draw the Alligator’s Teeth, Chin & Neck
Draw a slightly curved line from its mouth to draw the alligator’s chin.
There is no need to lift your pencil; continue by going left in a downward arc to draw its neck. Only go a little further than the line for its back.
The teeth can be drawn with 3 slightly spaced V-shaped lines from the bottom of the alligator’s snout.
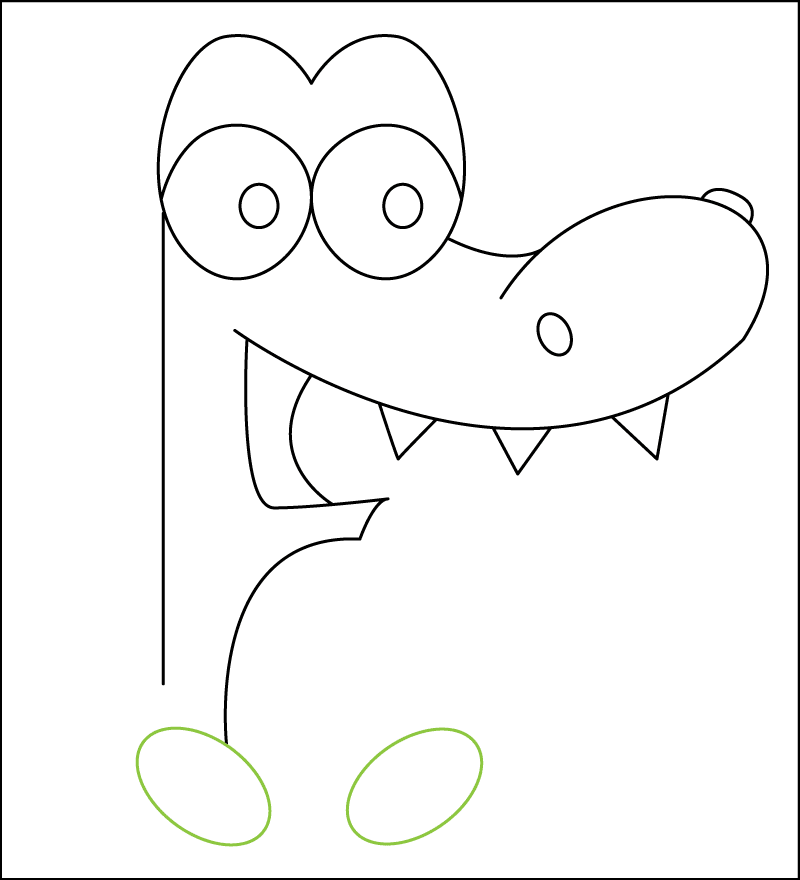
Step 6: Draw the Alligator’s Feet
Let’s draw the feet next. At the bottom of the line for the reptile’s neck, draw a diagonal, outward-facing oval. Draw another oval that is slanted the opposite way.

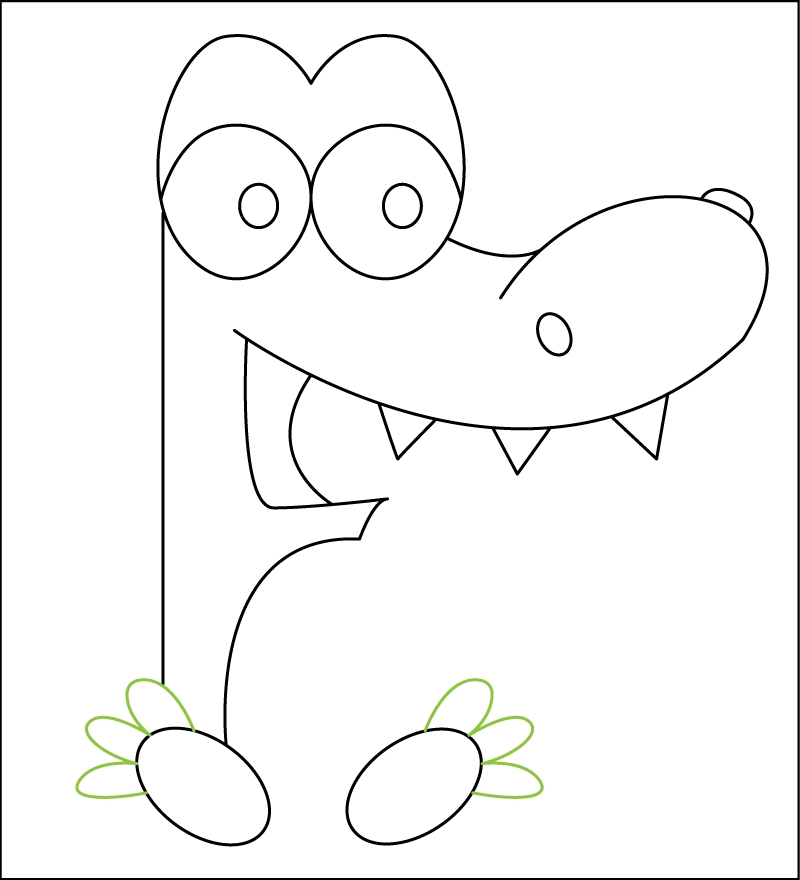
Step 7: Draw the Alligator’s Toes
The toes can be drawn with 3 connecting humps on each foot.
Step 8: Draw the Alligator’s Belly
Next, we can draw the alligator’s belly.
Draw a slightly curved line from the bottom of the alligator’s chin to the first toe on its left foot.
Then draw a horizontal line that connects both of the animal’s feet.


Step 9: Draw the Alligator’s Arms & Lines on Belly
We are almost done with our cute cartoon alligator.
To draw the gator’s front legs, draw 2 lines on its right and left side, as if you were drawing arms. The toes can be drawn with 3 connecting humps.
And finally, draw 3 horizontal lines on its belly. The lines should have a slight downward curve and be relatively evenly spaced.

How to Draw an Alligator PDF
Do you prefer to have the step-by-step instructions on paper? You can download a 1 page PDF showing how to draw this cute sitting alligator. Grab a free copy below.
The PDF will be sent to your email. It’s free to download and print.
More Alphabet Activities
For more letter A activities, try these beginning sounds worksheets.