Looking for an easy and fun way to teach kids how to draw a shark?
Grab these free printable step-by-step shark drawing tutorials, perfect for beginners. With just a few simple shapes, kids can draw their very own smiling shark.
Each printable shows how to draw a different shark species using just 6 simple steps.
Kids can learn to draw a:
- shark
- great white shark
- whale shark
- tiger shark
- hammerhead shark
- basking shark
- thresher shark
- goblin shark
- mako shark
It’s a great activity for Shark Week, an ocean unit study, or just a creative afternoon at home!


Supplies
You don’t need anything fancy! Just grab:
- a pencil
- an eraser
- a blank sheet of paper
- optional: crayons, markers, or colored pencils for coloring
How to Draw a Shark in 6 Easy Steps
You’ll find each step broken down with an image and simple instructions that kids can easily follow. Let’s get started!
Step 1: Draw The Shark’s Body Shape
Start by drawing a large curved shape that looks like a stretched-out bean. This will be the main body of your shark.
The right side of the shape will be its mouth and snout.

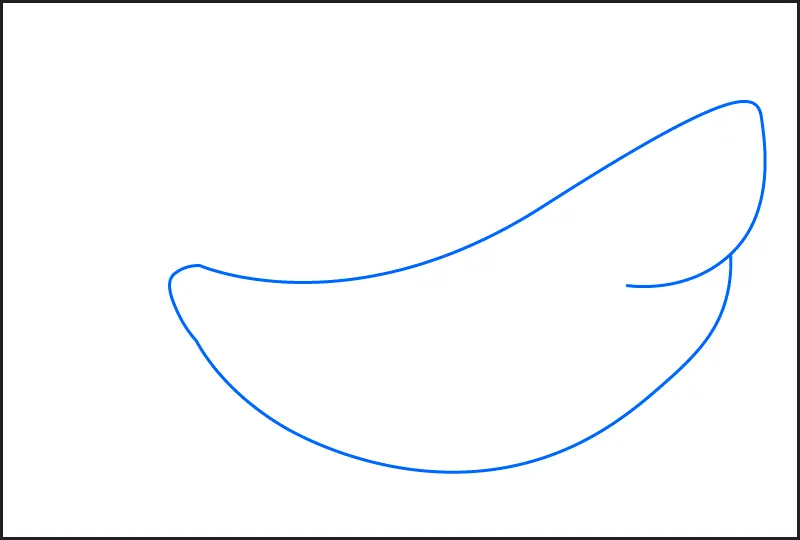
Add a small curve at the back to begin shaping the tail.
Step 2: Add The Tail Fin
Next we need to draw the tail or caudal fin.
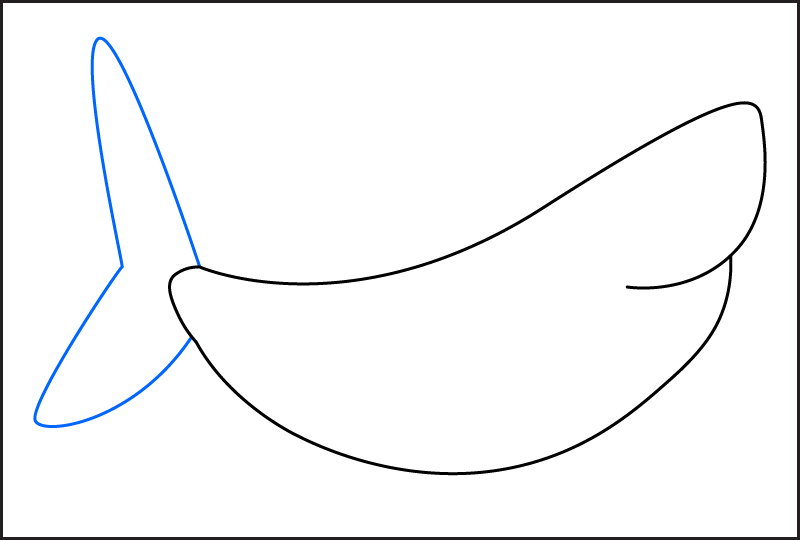
At the end of the body, draw a long V-shaped tail. The fin should have two points, one at the top and one at the bottom, curving away from the body.
Step 3: Draw The Anal and Dorsal Fins
To draw the first dorsal fin, draw a large triangular shape on top of the shark’s body.

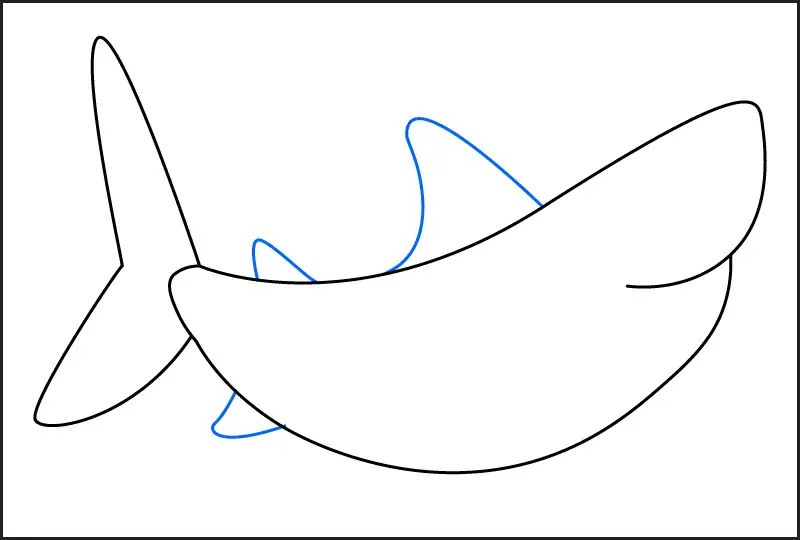
Next, add a smaller second dorsal fin closer to the tail, also on the top side of the body. It should be much smaller than the first, almost like a tiny triangle.
Then draw the anal fin on the bottom of the shark, just in front of the tail. It should be curved and slightly pointed, mirroring the second dorsal fin but on the underside.
Step 4: Add the Pectoral Fin and Belly Line
Draw the pectoral fin on the right side of the shark, curving forward.
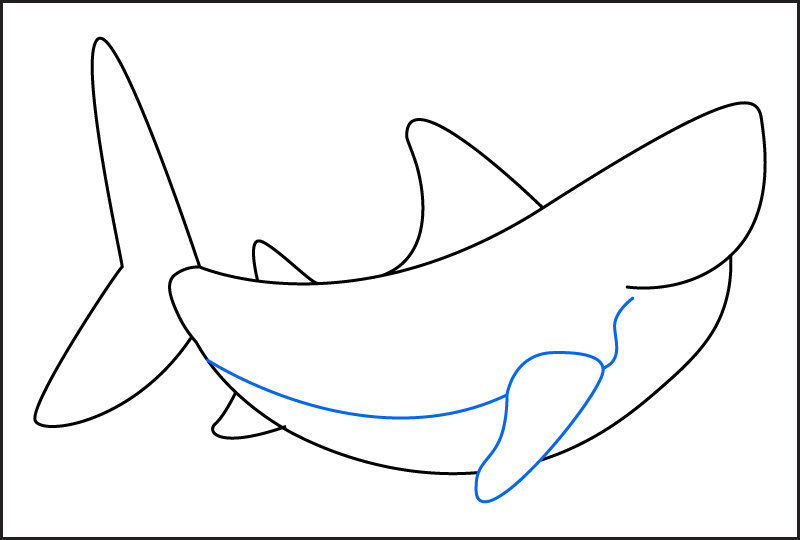
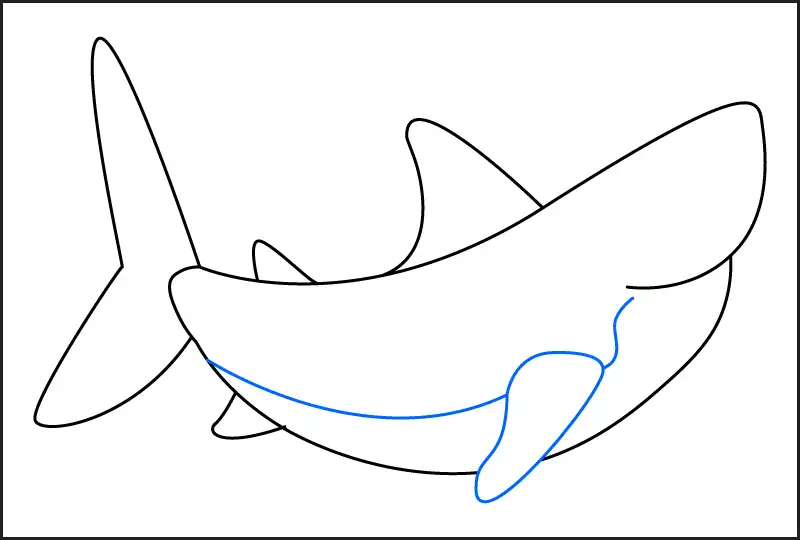
Then, to define the shark’s belly, draw a smooth curved line along the bottom of the body.
This line helps separate the upper part of the shark from its white underbelly. If you plan to color your shark later, you can use this line to show where the dark gray top meets the lighter underside.
Step 5: Draw the Gills and Teeth
Draw two short curved lines above the pectoral fin to show the gills.

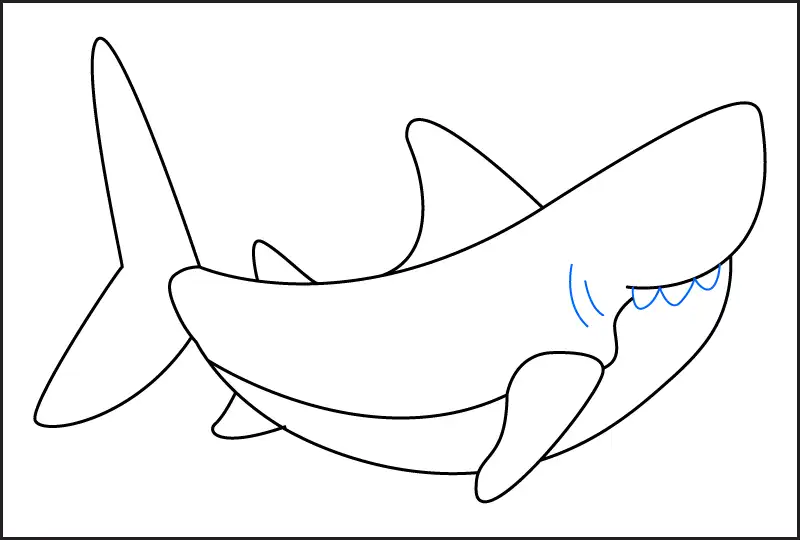
Next, draw 3 sharp and slightly rounded triangular teeth underneath the curved part of its mouth.
Step 6: Draw Its Nostrils and Right Eye
Drawing a small round eye above the edge of the shark’s mouth.
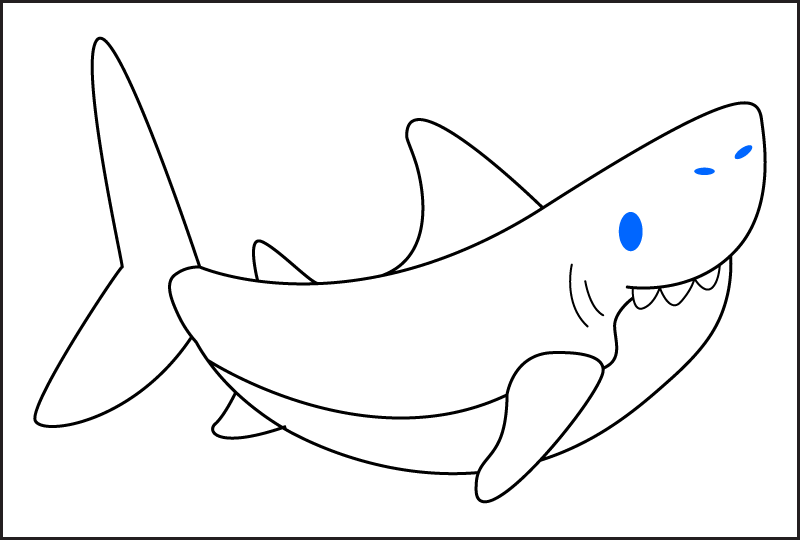
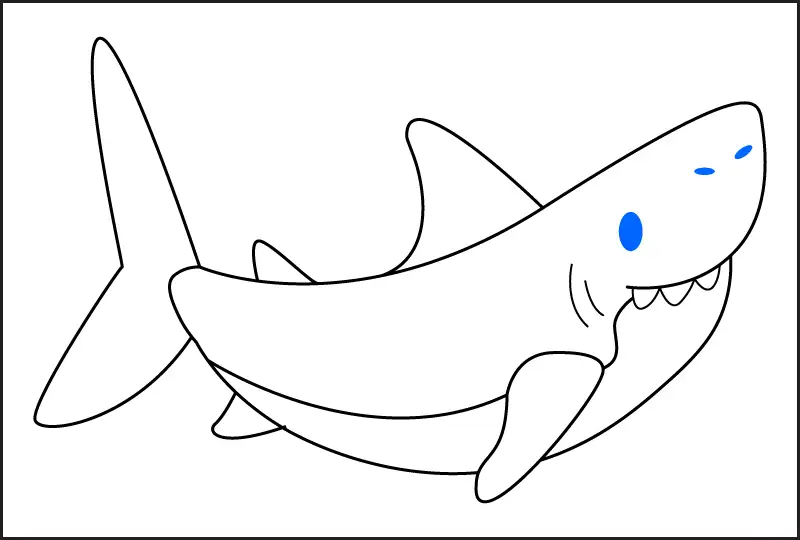
Finish your shark by drawing two small curved lines for the nostrils near the front of the face.
More Easy Shark Drawing Tutorials
Once you’ve learned the basic shark, try drawing some of the ocean’s most fascinating shark species. Each printable includes six simple drawing steps, a fun shark fact, and a place to draw each shark.
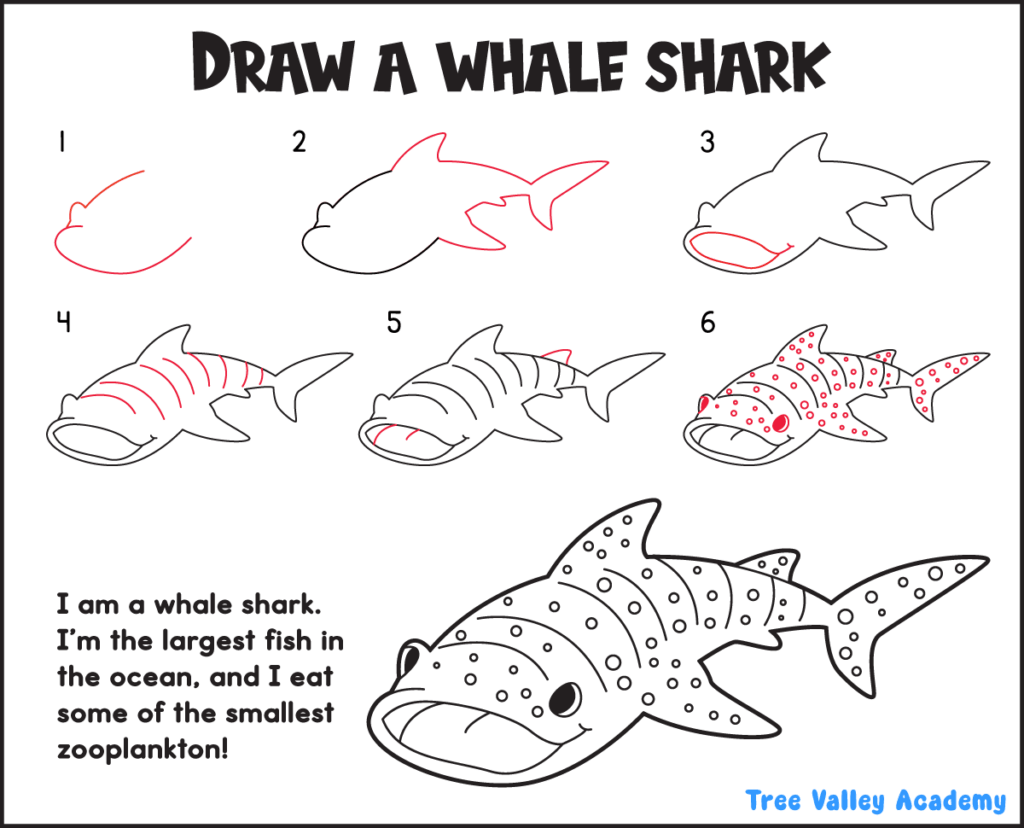
How to Draw a Whale Shark
Whale sharks are the largest fish in the world, yet they eat tiny plankton.
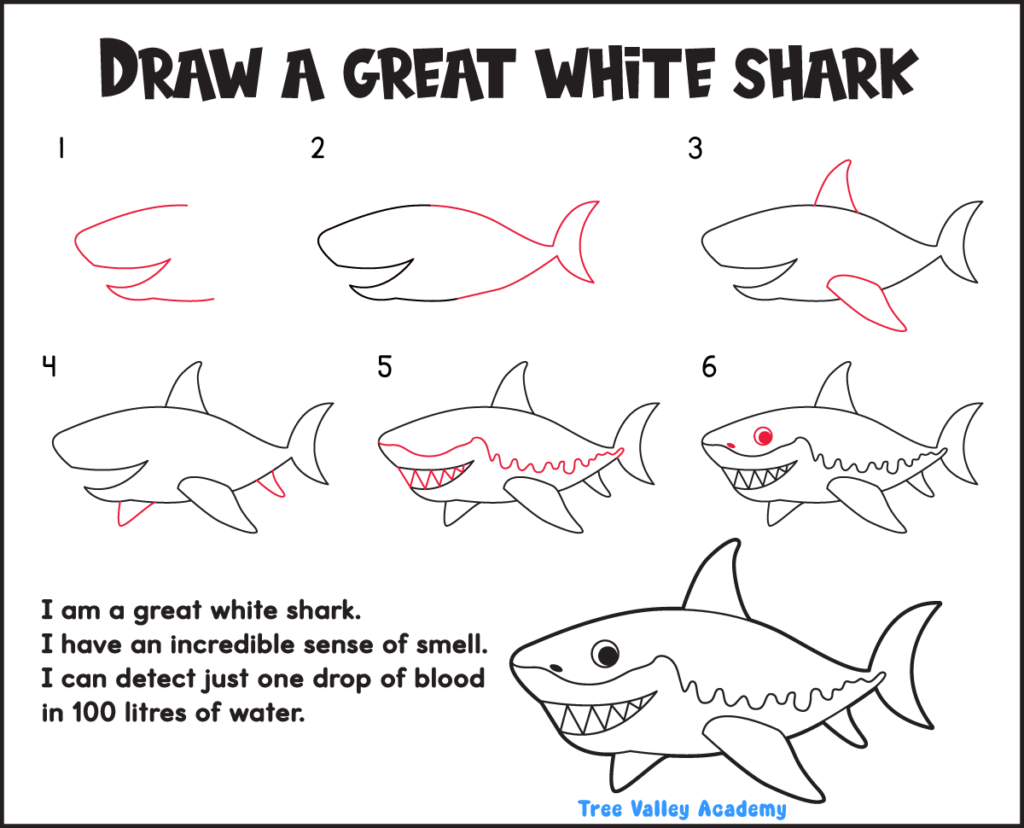
How to Draw a Great White Shark
Learn how to draw one of the ocean’s most famous predators.
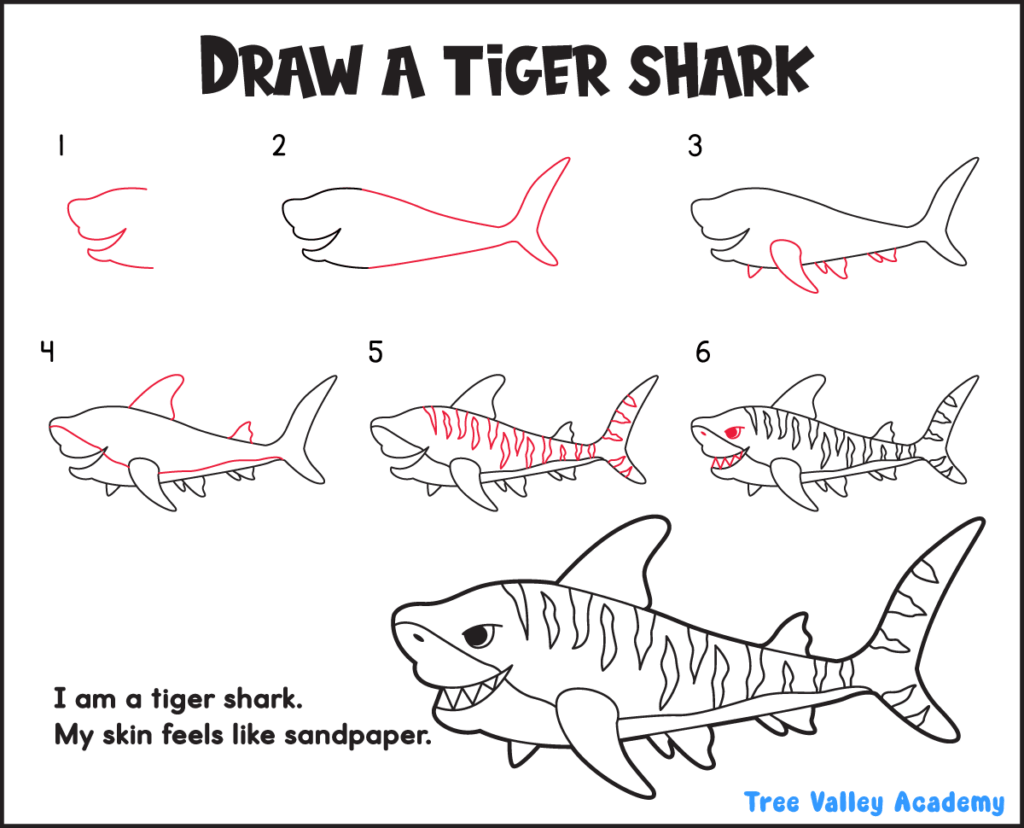
How to Draw a Tiger Shark
Tiger sharks are named after the dark stripes along their bodies.
How to Draw a Hammerhead Shark
The hammerhead’s wide head makes it one of the easiest sharks for kids to recognize.

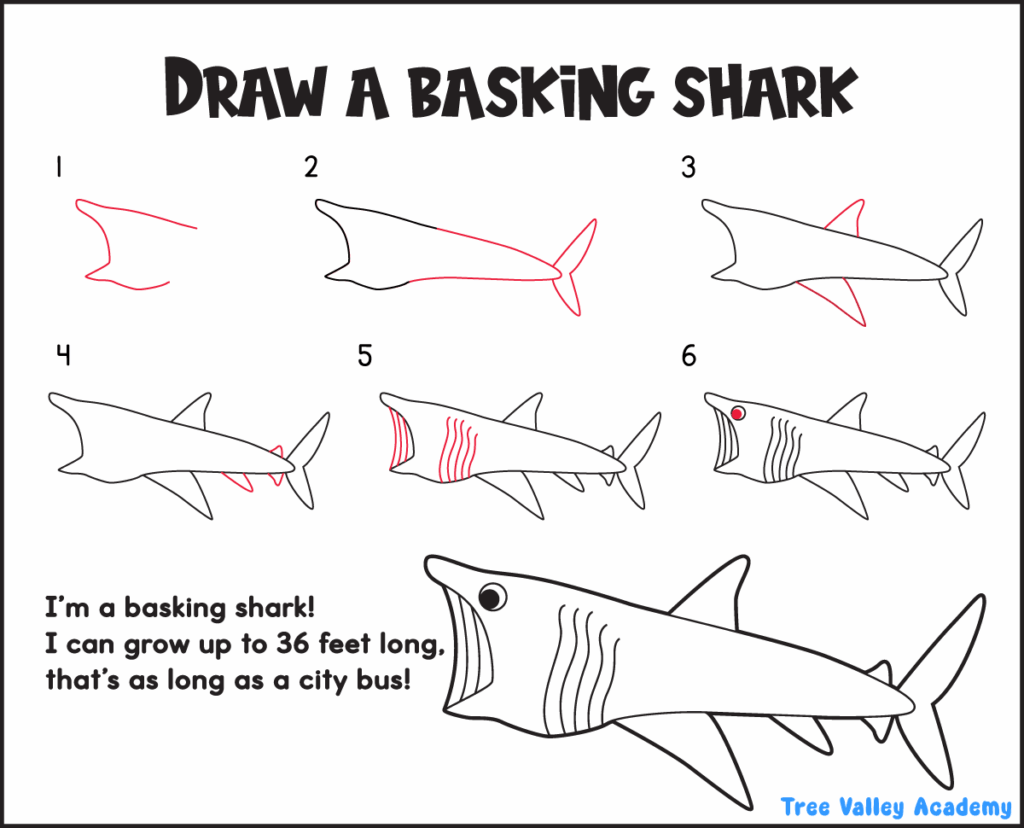
How to Draw a Basking Shark
Basking sharks are gentle giants that swim with their enormous mouths open while filtering plankton from the water.
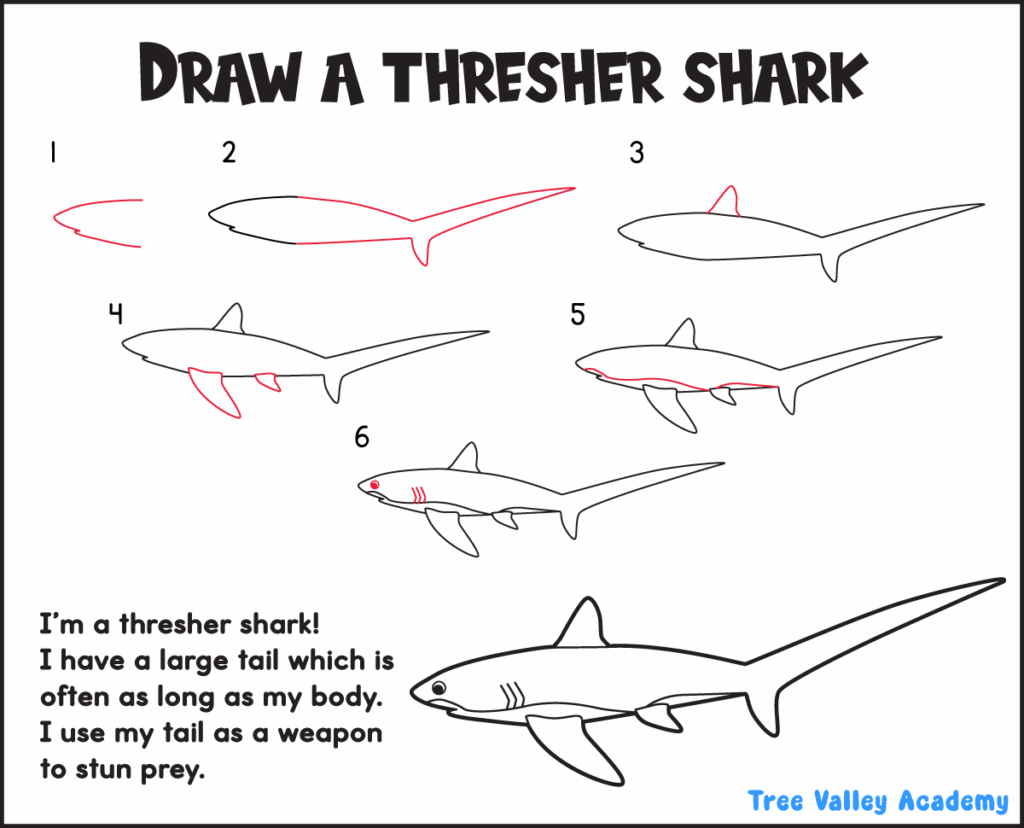
How to Draw a Thresher Shark
Thresher sharks are famous for their incredibly long tails, which they use to stun schools of fish.
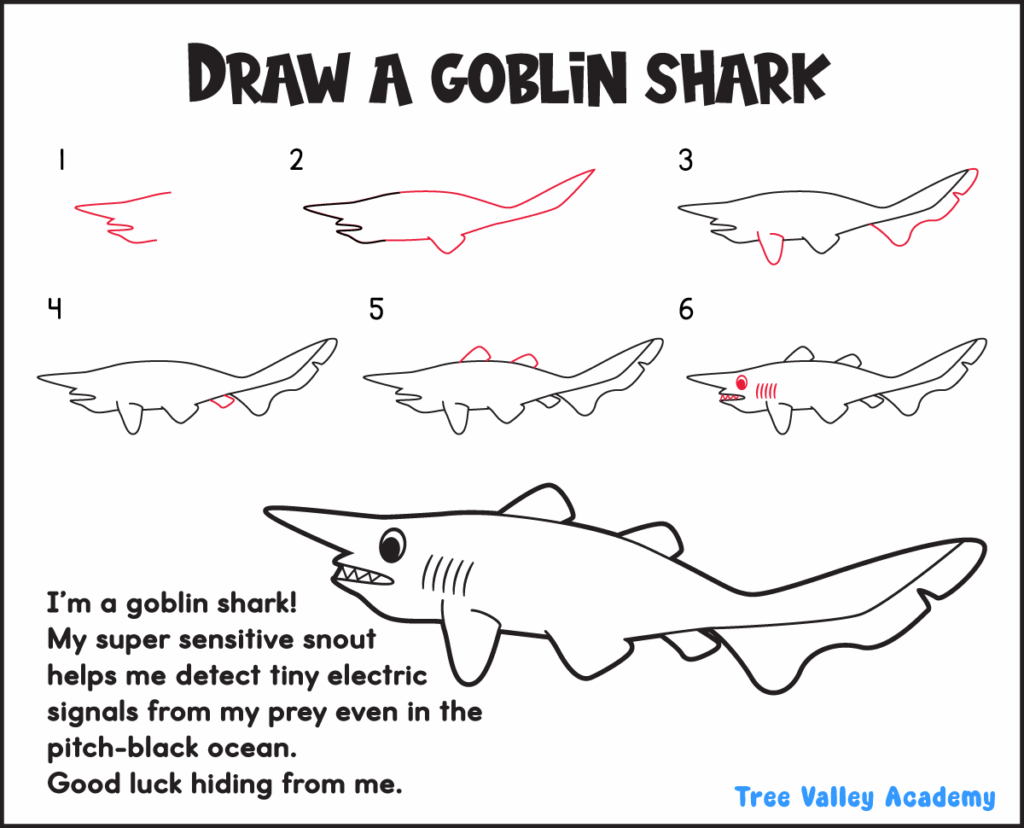
How to Draw a Goblin Shark
Goblin sharks have one of the strangest faces in the ocean. Their long snout makes them a fun and unique shark to draw.
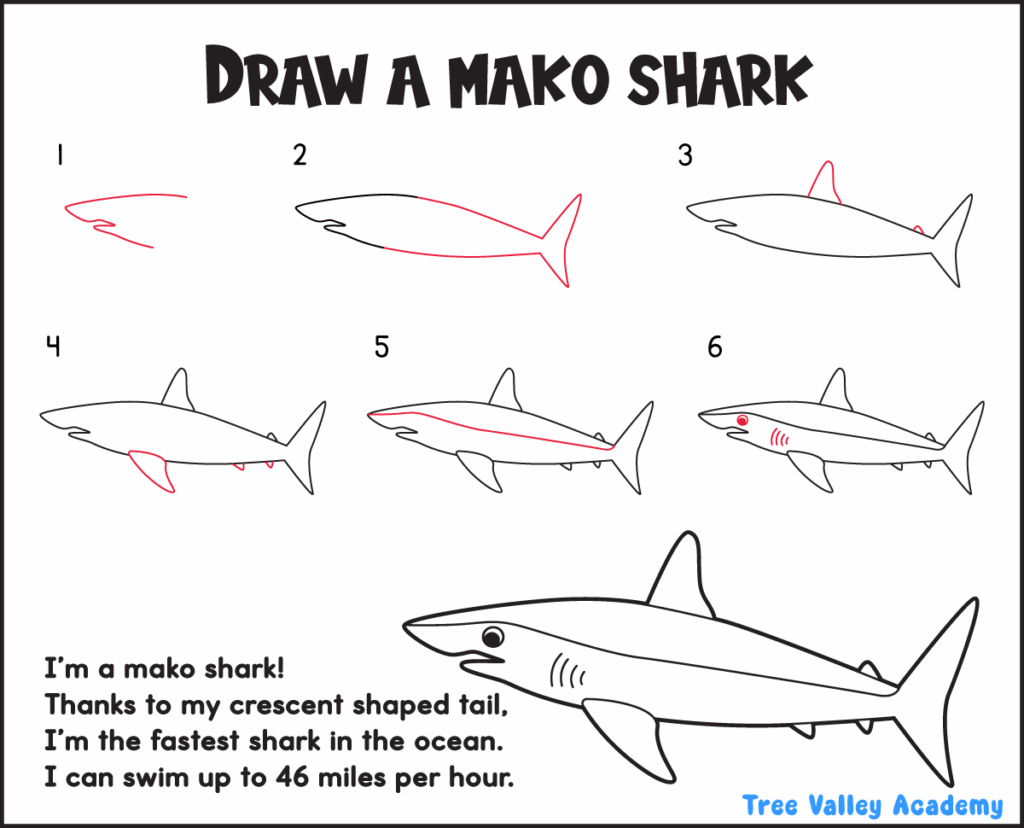
How to Draw a Mako Shark
Mako sharks are among the fastest sharks in the ocean. This streamlined shark is a fun challenge once kids have mastered the basic shark.
Download the Printable Drawing Collection
Want all nine shark drawing tutorials?
Use any of the forms below and we’ll send you the complete printable PDF collection featuring every shark drawing guide.
The PDF will be automatically sent to your email.
More Shark Activities for Kids
Here are some more fun printable shark week activities for kids:
- these printable shark crafts have 4 different sharks for kids to color
- shark tracing worksheet for preschoolers
- preschoolers and kindergarten students might enjoy this s is for shark craft and coloring page
Drawing Tips for Kids
- start with the basic shark before trying the more detailed shark species
- remind kids their drawings don’t have to be perfect
- let them trace the steps a few times before drawing freehand
- remember that every shark has a different body shape and fin size
- color your sharks after drawing them
- add fish, coral reefs, bubbles, seaweed, or an ocean background
- use the activity to learn fun facts about each shark species
- combine the art activity with a lesson on shark anatomy: teach kids the names of the body parts they are drawing
Fun Facts About the Sharks You’ll Draw
There are more than 500 known species of sharks. Here are some more fun facts:
- Great White Shark – One of the ocean’s top predators.
- Tiger Shark – Named for the dark stripes along its body.
- Whale Shark – The largest fish on Earth.
- Hammerhead Shark – Uses its wide head to help locate prey.
- Basking Shark – Eats tiny plankton instead of large fish.
- Goblin Shark – Sometimes called a “living fossil.”
- Thresher Shark – Uses its long tail like a whip.
- Mako Shark – One of the fastest sharks in the world.