I wanted to do a treasure map activity with my 6 year old to teach her some mapping skills. I told her we were going to pretend to be pirates and go on a backyard treasure hunt. The first step would be learning how to draw a treasure map for kids.
A quick learn-from-my-mistake word of advice:
Don’t tell your kids you’re going to be doing a pirate’s treasure hunt until you’re ready to give it your complete and undivided attention.
I made the mistake of telling my daughter during breakfast. And before I was able to clean up the breakfast dishes, get dressed, and do a few basic morning chores, my daughter had drew 2 treasure maps and dug 3 treasures in our yard.

How To Draw A Treasure Map For Kids
I had several learning objectives in mind when drawing a map with my 6 year old. I wanted to introduce her to:
- landmarks and making decisions on what to include on the map
- using symbols to represent a landmark
- letting others know what the symbols mean by adding a map key
- the compass and what it does
- showing cardinal directions on our map
All of these were much easier to teach with my 100% participation.
Deciding What To Include On Our Map
First, we walked around our yard together to scout possible landmarks to add to the map.
Permanent Landmarks
At one point my daughter suggested a small toy basketball net that was on the lawn. It was a great opportunity for me to point out to her some of the drawbacks of putting such a landmark on a map.
I told her “What if Grandma comes along and moves the net over here?” She got the point that we needed to choose a more permanent landmark.
Landmarks That Are Easy to Identify
I also made sure that she understood that we needed to choose landmarks that would be easy to identify from a map.
For example, in a forest full of trees, would we be able to use a specific tree as a landmark? Most of the time that would be difficult but sometimes a tree was unique either in it’s location or another unique factor about it.
We had one tree with a satellite dish mounted on it. Or perhaps a tree had a bird house on it, or a bee nest, or was comparably different in size or another feature than the trees surrounding it.
Sketching Our Rough Draft
Each with a paper and pencil, we sat in the yard together to draw our individual maps.
It helped my daughter to see how I was doing my map, and she would frequently look at my map when drawing her own map. I told her to lightly sketch out the bigger main elements and gradually fill the places with the smaller landmarks.
Both our papers were quite rough looking, so we took these rough drafts into the house to each redraw our final version. We spent quite a bit of time together, just drawing and coloring.
Symbols and a Map Key
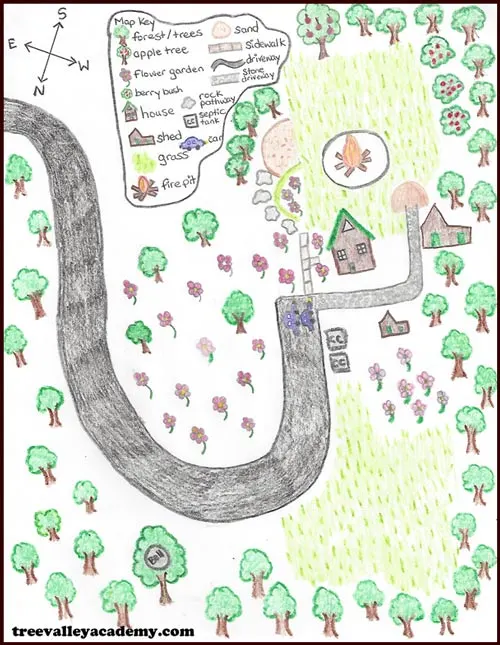
While drawing our maps, I encouraged my daughter to use a symbol or simplified drawing to represent what she was trying to draw. She created her own symbols but was learning and gathering inspiration by looking over at the symbols I came up with.
Next, we needed to create a map key.
At 6 years old, kids usually write on the bigger side, and my daughter is no exception. It seemed like an impossible task to ask her to fit her map key somewhere on her 8 1/2 by 11 page map. Although, I managed to, even I found it challenging. So I gave her another whole paper for writing her legend.
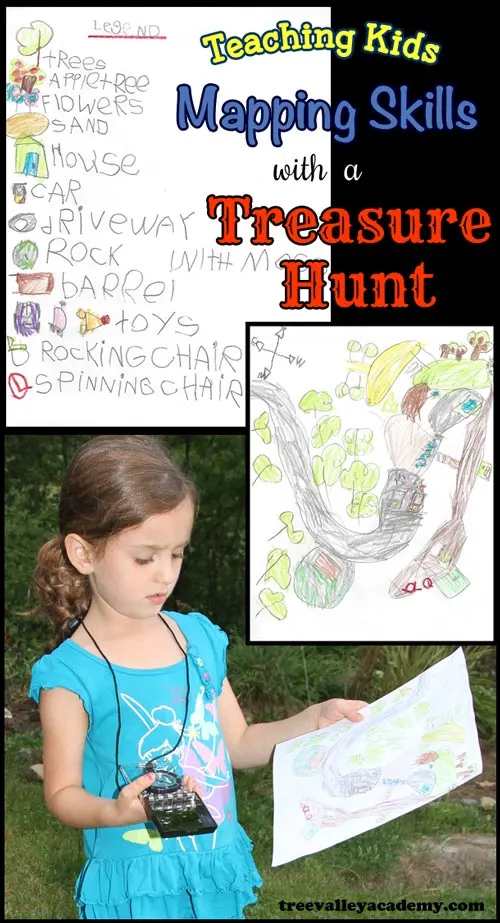
We took note of what symbols she had created on her map and I wrote what she told me those symbols were on a separate paper. That way she would know how to spell the words, and would be able to look at it to write her map key.
I told her to draw her symbols on the map key the same way she had drawn it on her map, using the same colors she originally had used.
Using A Compass To Mark The Cardinal Directions
When both our maps were drawn, we took them and a compass outside. We each made sure our map was facing the right direction, and using a compass determined where North, West, South and East were on our map, and indicated those directions on each of our maps. My daughter quite enjoyed playing with the compass.
Preparing for the Treasure Hunt
The Map
To make our maps reusable for our treasure hunt, I put both of our maps back to back in a freezer ziplock bag.
The plastic was a good surface to use our dry erase markers. This will allow us to mark up the map to indicate where we have hidden treasure, and then easily erase those markings to start fresh for a new treasure hunt.
The maps didn’t quite fill the ziplock bag width wise, so I cut out a piece of lightish color construction paper to tape in that area. This gave us a good spot to write our short formed directions, and made that area a little more sturdy to hold.
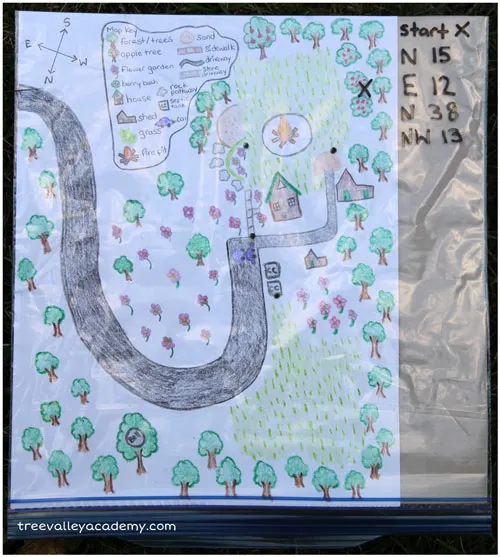
Length wise, the 8 1/2 X 11 maps were a smidge too long. I could have trimmed the maps slightly but didn’t as the ziplock still closed just fine.
Of course, instead of the freezer bag you could laminate your map, use 3 hole punch plastic sheet covers, etc.
The Treasure
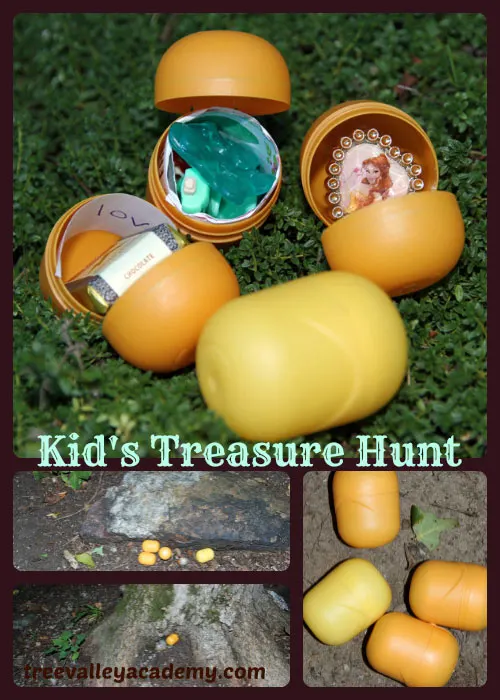
Time to prepare our treasure, we used the containers from Kinder Surprise Eggs.
We’ve always kept them and they make great little containers to hide small treasures. I put in messages, chocolates, and small toys we had on hand.
Getting Into Character
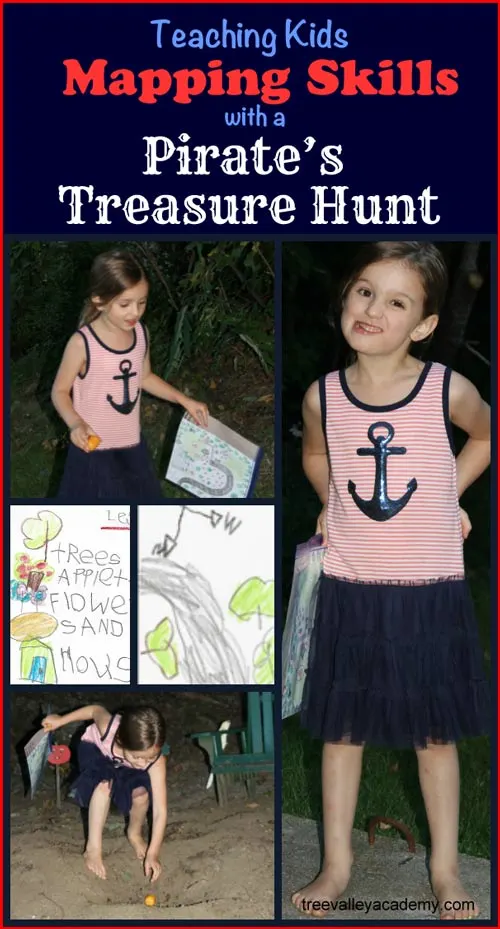
The last preparation for our treasure hunt was to get into character. My daughter wanted to dress the part. She’s more of a girly pirate, so she wanted to wear her “pirate dress“.
She also got into character by trying to talk like a pirate, I was quite amused. She would talk from the side of her mouth, and would tell me: “Don’t help me. I’m supposed to be a pirate, searching for treasure! Aarrr! Aarrr!”
When she found a treasure, she would say “Shiver me Timbers, I found me a treasure!“
The Treasure Hunt
Our First Attempt
I hid the treasures the first time. At first, I thought to do some offline coding kind of idea, and wrote directions on her map like:
Start at X West 7 steps N 22 steps, etc.
It was a good idea, but didn’t work out the greatest. For starters our step sizes are wildly different. And since we were just using our map, going West for example is not so precise, and allows for far too many possible end points.
My daughter did not seem to mind tho and had a lot of fun, no matter how good the directions were.
Better Idea
So second round, we dropped counting steps.
I just drew dots on her map where treasure was, and she went to those areas to find them. It was great practice at using a map.
And she got some more map practice when she hid the treasure for me, and would need to mark on the map the treasure spots.
Getting Creative
Third round, we got a bit creative, and decided we had to find the treasure in a certain order.
The person hiding the treasure put numbers on each of the eggs with the dry erase marker and hid them around the yard.
They would then put dots on the map where each treasure could be found. They would need to draw an X on the map to tell the searcher where to start. They also needed to write cardinal directions in the space beside the map to indicate the direction (N, S, W, E, NW, etc.) of the next egg.
The seeker could then look on the map, and following the direction given, determine which dot they were supposed to go to next.
Me hearties, there was a lot of mapping skills packed into our educational treasure hunt activity! And when learning is play, kids just soak it up, you savvy?
Aaaarrrrr!

jose
Monday 30th of March 2020
it looks fun to try to look for a tresure but having a map but its probloby not to easy and you do need to understand it and look carful
Sarah
Wednesday 14th of September 2016
This is awesome! I love the map making skills reinforced here. What a detailed map legend! I wish I had a pirate dress like that!